• Skip to primary navigation
  • Skip to main content
  • Skip to primary sidebar
  • Skip to footer
MinutesGuide.com

MinutesGuide.com

It is Not Just About WordPress

  • Home
  • About
  • Blog
    • Blogger Talk
    • Email Marketing
    • Hosting Talk
    • Plugins
    • Themes
      • Extra & Divi
    • WPbeginner
      • Guide
      • Life Hacks
      • WP Fix
    • WP Security
    • WP SEO
    • WooCommerce
  • Services
  • Reference
  • Contact
  • Start Here
Home » Blog » WooCommerce » Redirect to Checkout Page Afte…

Redirect to Checkout Page After Add to Cart in WooCommerce

Post on November 16, 2017 | Updated on November 29, 2020 by FaizAlias 1 Comment

Redirect to Checkout Page After Add to Cart in WooCommerce | We have received a request from our reader to show him how to make a redirect to checkout page after someone click Add to Cart button in WooCommerce.

So today, we will show you how you can do it for your WooCommerce.

First of all, you must ask a question by yourself why and when you can apply this?

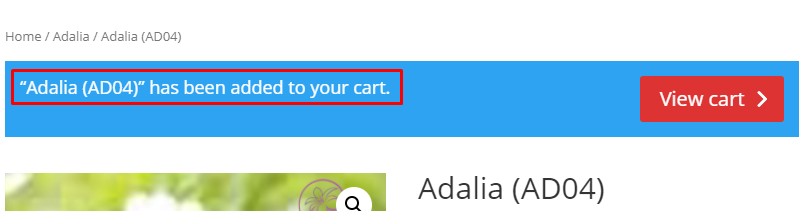
By default, after someone click Add to Cart button, they will static on the product page and just show a message “[Product’s name] has been added to your cart.”  Sometimes, this is very annoying situation for some reasons.

Do you feel it annoying or okay? If okay just ignore it. If not okay, you must continue this tutorial to fix this.

Redirect to Checkout Page After Add to Cart

Before we start, I would like to recommend you to backup your database first. If anything wrong happens, you can restore it anytime.

Step 1: First, you must uncheck Add to cart behaviour. Go to WooCommerce >>> Settings >>> Product Tab >>> Display. You will see the section like as screenshot below. Uncheck both of them.

Step 2: Copy and paste code below and put it into your functions.php

Save your changes, and now your WooCommerce will direct to the checkout page.

Conclusion

In this tutorial, you have learned how to customize your WooCommerce to make sure your client redirect to checkout page after they click on Add to Cart button.

If you like this article, then please FOLLOW our Linkedin, Twitter, YouTube, Pinterest, and Facebook. Do not forget to check our services page to upgrade your WordPress. If you find this post has an issue with copyright, outdated, or in error, please contact us to fix it.

Related Article..

  • Unpaid Order Cancelled – Time Limit Reached
  • Change Text “Returning Customer?” Message on WooCommerce Checkout
  • How to Put Logo in WooCommerce Email Template
  • How to Remove Billing Address in WooCommerce (Easy Step)
  • How to Change Order Status Automatically in WooCommerce?

Filed Under: WooCommerce

Reader Interactions

Comments

  1. blankLobby says

    November 18, 2017 at 8:25 am

    Aha, has got! Thanks for this tutorial

    Reply

Leave a Reply Cancel reply

Your email address will not be published. Required fields are marked *

Primary Sidebar

Follow Me

  • Facebook
  • GitHub
  • LinkedIn
  • Pinterest
  • Twitter
  • YouTube

Start With…

blank
Start Blogging
blank
eShop Guide
blank
WP Guide
blank
WP Security

Categories

blank

Footer

About MinutesGuide

Was founded in October 2017 by FaizAlias. The main goal of this site is to provide quality tips, tricks, hacks in easy way that you can learn it just in minutes.

Highlight Service

Ninja Tables Pro Installation And Setting
CSS Hero Plugin Installation And Setting
Divi Theme Installation & Settings
Build Complete eCommerce Site

Quicklink

Home
Services
Contact
Blog

Copyright © 2021 · Designed by SM Creative Studio | Hosted by Cloudways DMCA.com Protection Status

  • Privacy Policy
  • Terms of Use