How to backup a Website manually? As a website owner, you need to do backup your site at least once per week.
For what?
Of course it for a backup plan if something happens to your website. But, if you using Cloudways, you no need to do the backup manually because it has own backup system. If something happens, you just click with once click to restore.
Ok, I do not want to tell details about Cloudways. If you think this is nice for you, just explore yourself.
Straight to the point, now I will show you how to create a backup manually on your cPanel for your website.
Let’s get started.
How to Backup Website Manually
For backup manually, I will separate into two parts which are parts 1 is how to backup folder for website and the second parts how to backup database for website.
Part #1: Backup Folder of Website
Step 1: Login to your cPanel account. If you don’t know how to use cPanel, please refer to tutorial on how to login cPanel.
Step 2: Navigate to path your website folder stored. Usually, the path folder for website in cPanel is located in File » File Manager » public_html
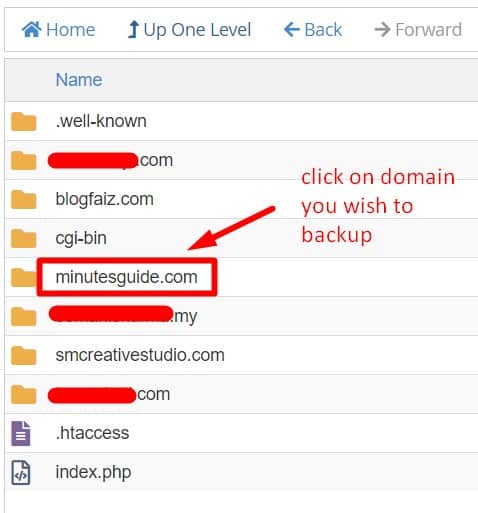
Choose the folder site you wish to backup and open it. If you look above, I have more than one website in one cPanel. So, it will look like that.
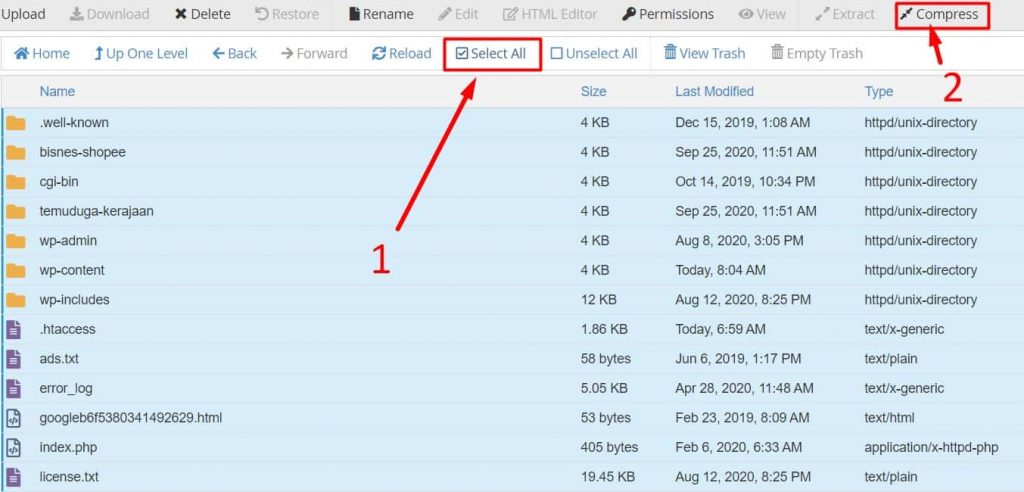
Step 3: When you open the folder, you will look like the picture below. Then select all and click on the compress menu to compress all files.
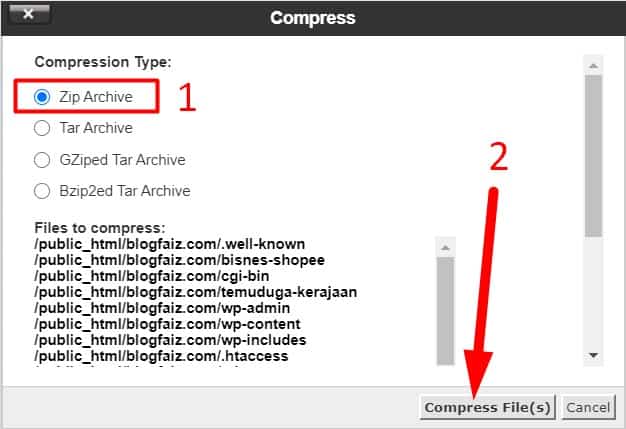
After you click compress, it will appear pop out like the picture below. Choose the compression type as Zip Archive and hit the button Compress File(s) again.
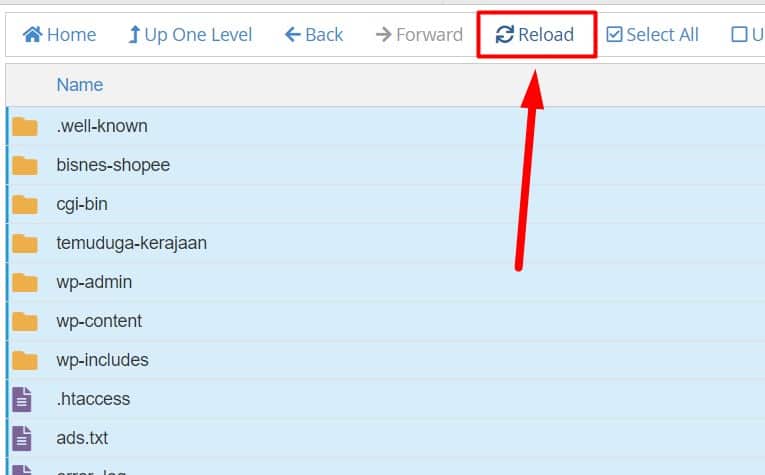
Step 4: Still on the same page. When finish, click reload and your compression file will appear and it ready to download. Your compression file is in .zip format because on step 3 you choose compression type as Zip Archive.
Done for folder backup. That all. Now we go on with database backup.
Part #2: Backup Database of Website
To make your website live on current(new) hosting, you must have a file/content website and connect with their proper database. In part 1, I have shown you how to do the backup folder of website. Now, I will show you how to backup database of website manually.
Step 1: I assume you have logged into your cPanel. If not, please login first to your cPanel.
Step 2: In cPanel, go to Database section and click on phpMyAdmin.
Step 3: Here, you must identify which one database website you wish to backup. When you identify it, click on it.
Step 4: Then, you will see like the picture below.
Explaination below;
- Number 1 – Click menu Export
- Number 2 – Choose Custom – Display possible option
- Number 3 – Choose format SQL
- Number 4 – Select All database
Then, scroll down and select Zipped as shown on the picture below.
Lastly click on the Go button.
Then, automatically you can download the database and save it on the safe place. You will need the database and upload to your new hosting.
Conclusion
In conclusion, you have learned how to back up the folder and database of the website manually via cPanel. In this tutorial, I just not focuses on WordPress site only but you can apply this to backup any website type. I know many people hate manual process buat manual process sometimes is a natural process and good be to practice.