The first time I use SSH, there is no proper tutorial on how to use SSH. I found one, but it very complicated tutorial. It very hard to understand.
So here, I will try to make a tutorial as simple as I can how to use SSH to connect your server.

Before that, let’s me introduce about it.
What is SSH?
SSH is a short form to Secure Socket Shell, which is a protocol that allows you to connect securely to remote a computer or a server by using a text-based interface.
When the SSH connection is established, a shell session will be started, and you will be able to manipulate the server by inserting commands on your local computer.
Now let’s we look how to use SSH.
HOW TO USE SSH
Below are basic requirements to meet before you can use SSH and connect your server.
- The remote computer must be turned on at all times and have a network connection.
- The client and server applications need to be installed and enabled.
- You need the IP address or the name of the remote machine you want to connect to.
- You need to have the necessary permissions to access the remote computer.
- Firewall settings need to allow the remote connection.
Simply, you need VPS server. It will meet all of these requirements.
Step 1: Before you can use it, you must install the program called puTTY. To install it, go to putty.org and download it here for free.

After you click “here” such as the image above, it will bring you to page like below.
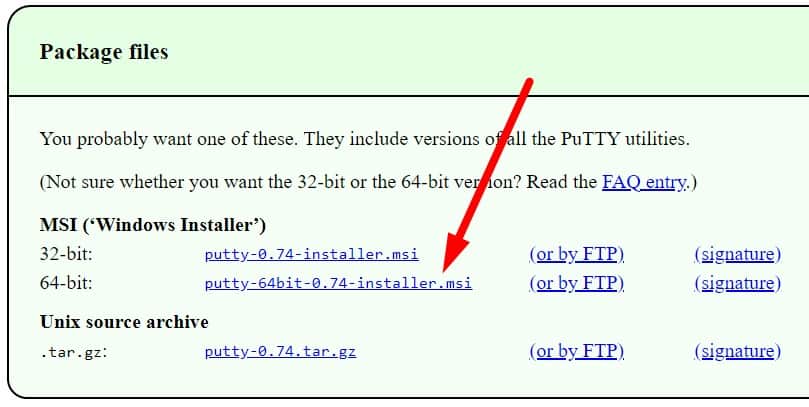
Here you must choose what type of bit your computer use.
Like me, my computer use 64-bit so I just click puTTY installer for 64-bit.
Just click it.
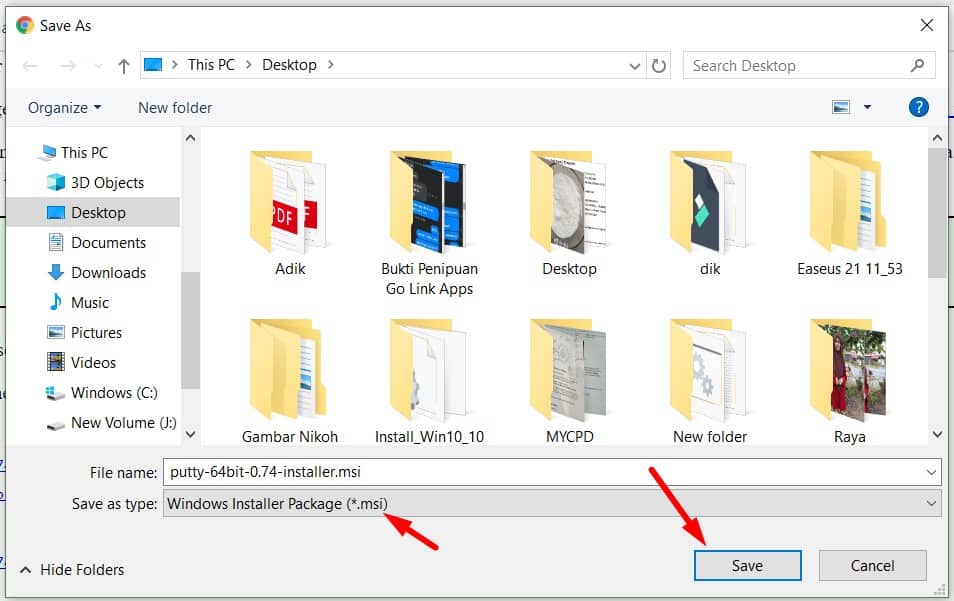
Step 2: Choose the path where you want to save this installer on your desktop or computer.
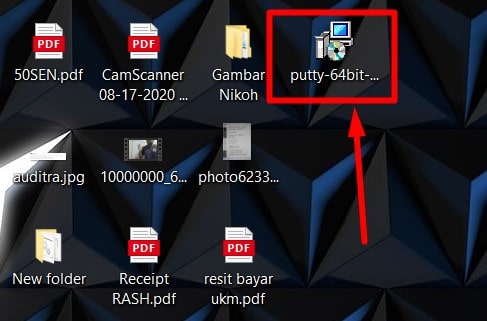
Step 3: Open the folder containing puTTY installer which is you download just now, and double click to start to install puTTY on your desktop.
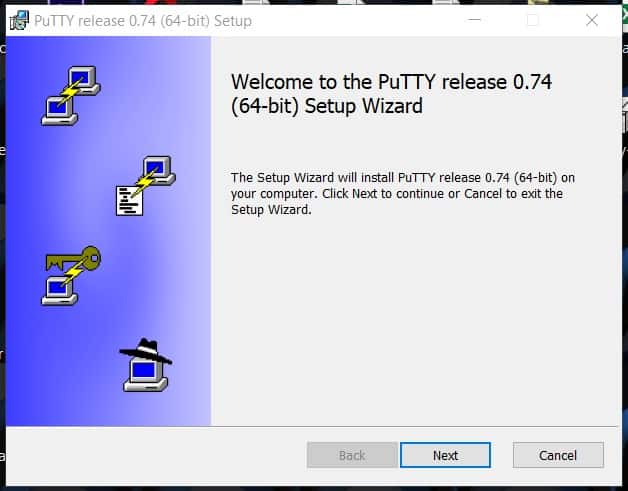
Step 4: After you double click on the puTTY installer, your desktop will asking you permission to install it. Just click next and finish the installation.
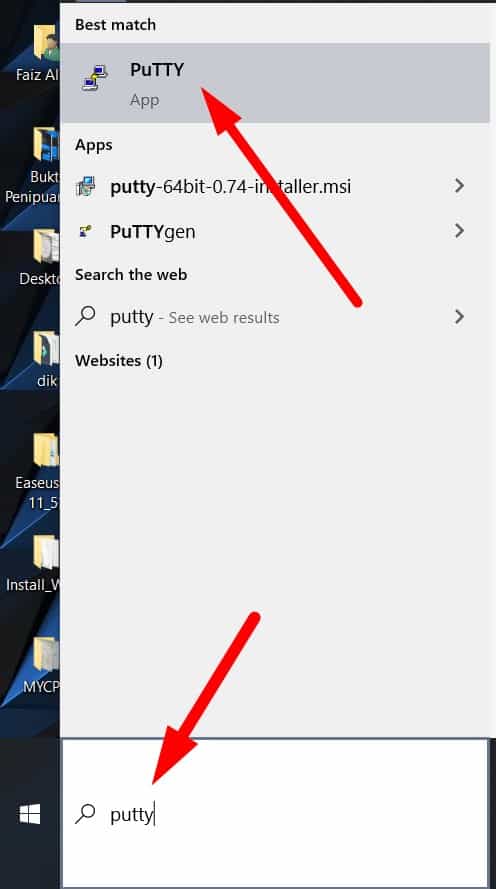
Step 5: When already finish, search the puTTY app by typing “puTTY” on your search desktop and it will show you the puTTY app. Just click on it to launch. Refer to the image below for more understanding.
Step 6: Now, puTTY app ready to connect your server via SSH.
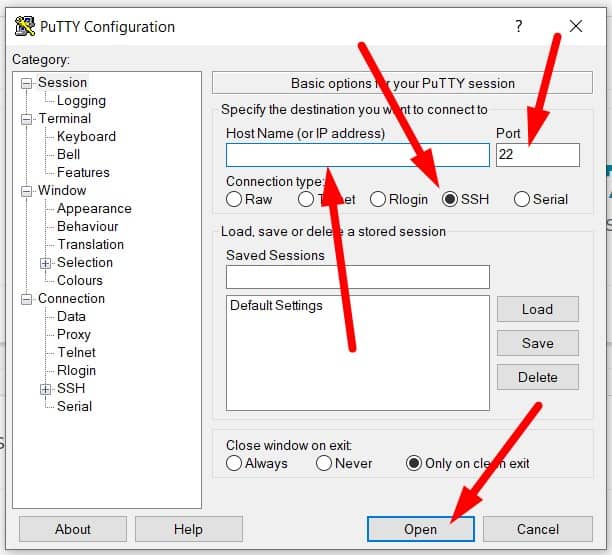
What you need now is, just insert your Hostname or IP address of your server and port for SSH.
All of these you can get via your hosting provider.
Step 7: Finally, to connect your server via SSH just insert your login and password credential of your server.
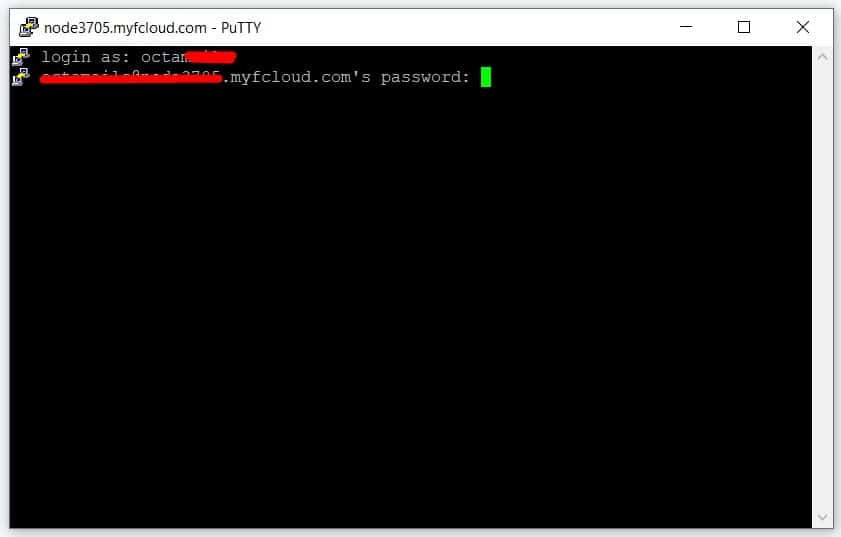
Wait.
Maybe you get confuse why you unable to enter the password right? Or the puTTY app got stuck?
No.
Please note that when you insert your password here, your password will be invisible. So, you just write the correct password and then click enter.
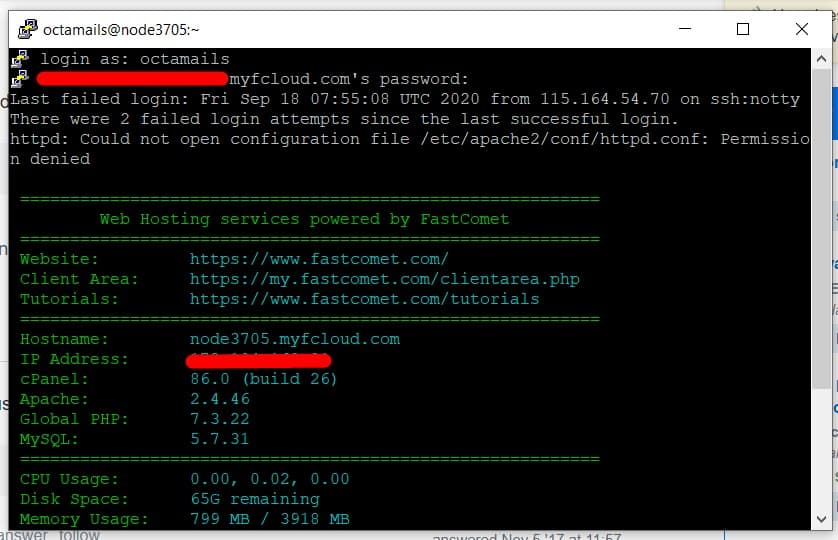
If you success login, the puTTY app will show you some detail about your server like, hostname, IP address, CPU and more.
Last but not least, insert command to run it.
In the next tutorial, I will show you how to run command in SSH.
Hope this tutorial can help you a lot.
Conclusion
In this tutorial, I have shown you how to download and install puTTY and how to use it to login SSH. If you have any questions, please drop a comment below.


0 Comments