Are you looking for how to add Google analytics to WordPress site? One of the important things after you finish install WordPress is, add Google Analytics to your site immediately.
Google Analytics is the best way to monitor your site in terms of how many visitors visit your site (day, week, and month) live total current visitors, the hot keyword on your site, hot topic and more.
From here, when you got an analysis of your visitor behavior, you can improve your site from time to time to get more traffic and earning. Looks simple but it can help you more to succeed.
You should know that Google Analytics does not give any SEO benefit to your website but it just helps you how to improve your site from the data you get from it. So, if you not install Google Analytics it does not matter to your SEO. For SEO, you just need to write something that gives value to readers.

How to Add Google Analytics to WordPress? (Summary)
First, you need to Create Google Analytic Tracking Code
Then you choose which one method you want to integrate in your WordPress site.
Method #1 - Add Without Using Plugin
Method #2 - Add Using Plugin (MonsterInsight)
So, in this article, I will show you how to add Google Analytics to a WordPress site. Actually, you can use this guide to install any platform site you have. Not just for a WordPress site only.
How to Add Google Analytics to WordPress
Google Analytics is sync from a Gmail account or Google account. So, you need to sign in to your Gmail account first. If you do not have a Gmail account, please sign up for one. But I believe all of you already have a Gmail account.
So, let's begin.
Create Google Analytic Tracking Code
Step 1: As I mention you above, please sign in or sign up to your Gmail account first.
Step 2: After sign in to your Gmail account, go to Google Analytics Dashboard to open your Google Analytics.
If you already sign in to your Gmail account, you should redirect to the dashboard.
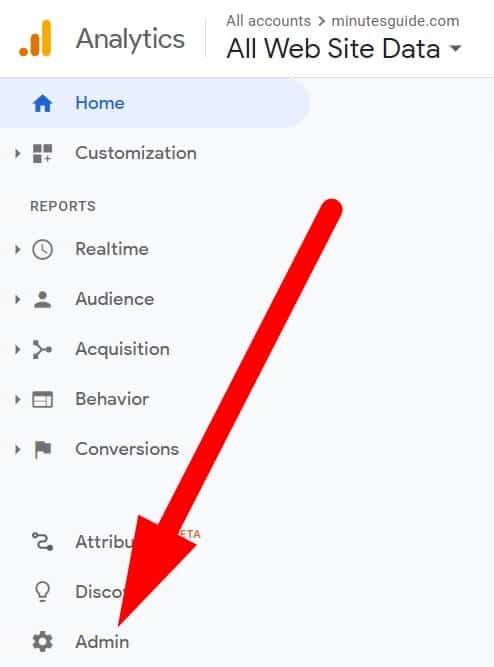
Step 3: On left, there are menu to choose. Click on Admin menu.
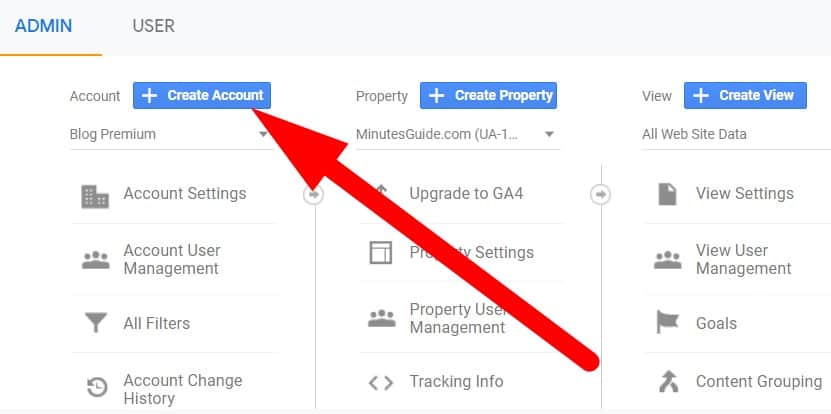
Step 4: Under the Admin tab, click the button Create Account to set up your new tracking ID.
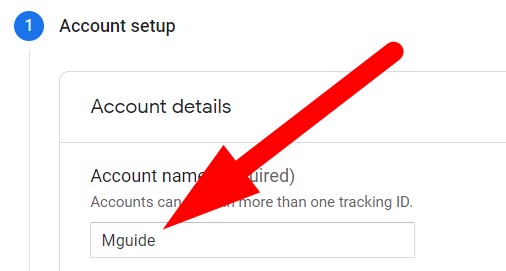
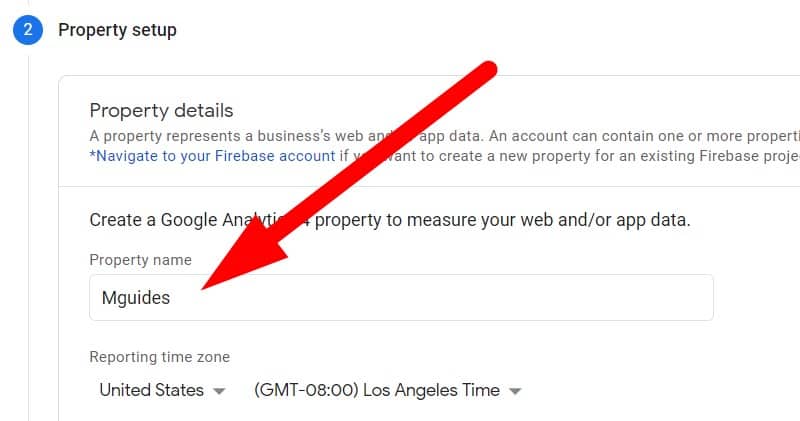
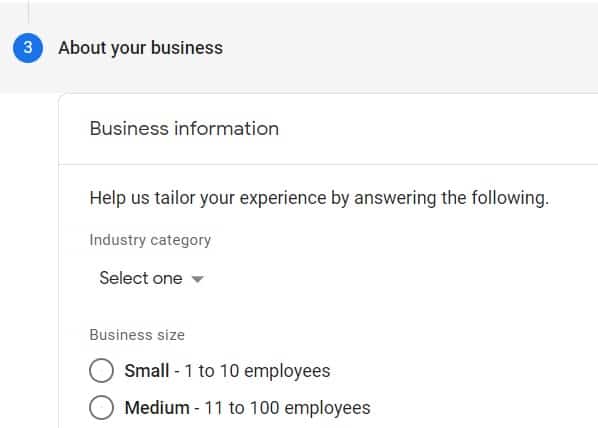
Step 5: Here, there are three part. Part 1 Account setup. Part 2 Property setup and Part 3 About your business. You need to fullfill all fields.
On account setup, just named your account. Maybe you want to put your domain name here.
For property setup, just give any name for your property. You can put your domain name here too.
On About your business, just fill in the blanks about your business.
Then, you need to click on Create button.
After that, the popout will appear and just agree all of terms of service.
Step 6: After that, you should redirect to page like the picture below.
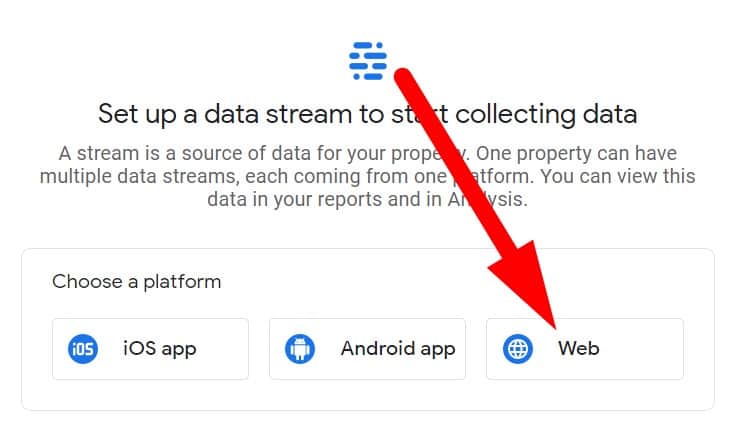
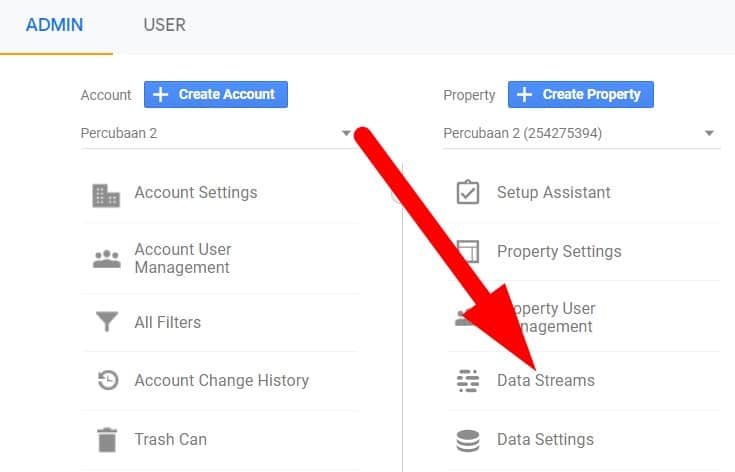
If not, go to under Property » Data Streams and you need to choose Web type like the picture above. If you want to tracking you app, so you can choose either iOS app or Android app.
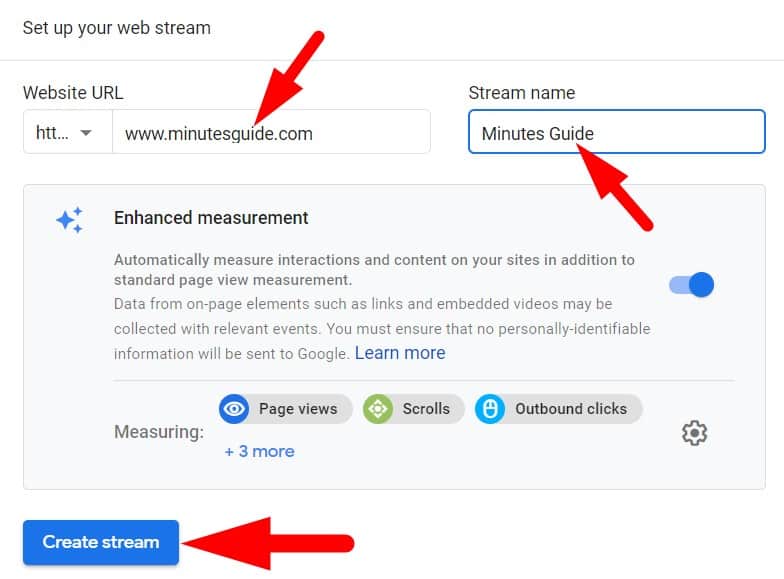
Step 7: Here, you need to enter the URL of your website, give Stream name and click on the button Create stream.
Step 8: Directly it will be brought you to tracking code. This code you need to copy and paste to your website between <head>Tracking Code</head>

Now, your tracking code you have got it. Now, you must add it to your WordPress site.
Ok. Here I have to methods to show you how to install it.
Method 1: Add Without Using Plugin
The tracking code that you just created above, just copy and paste into the website between on <head> section.
How?
Nowadays, all new theme technology has easy integration for code. If not, you need to access to current Theme root at cPanel and find header.php.
You need to paste to code in header.php.
But, for this I strongly recommend to use child theme when you want to edit it.
Step 1: If you using Divi Theme, navigate to Divi » Theme Options » Integration
Step 2: Copy and paste the code on the section Add code to the < head > of your blog
Method 2: Add Using Plugin (MonsterInsight)
Step 1: Please install the plugin Monster Insight first.
Step 2: Directly, you will be brought to the page like below.

Click on the buton Launch the Wizard.
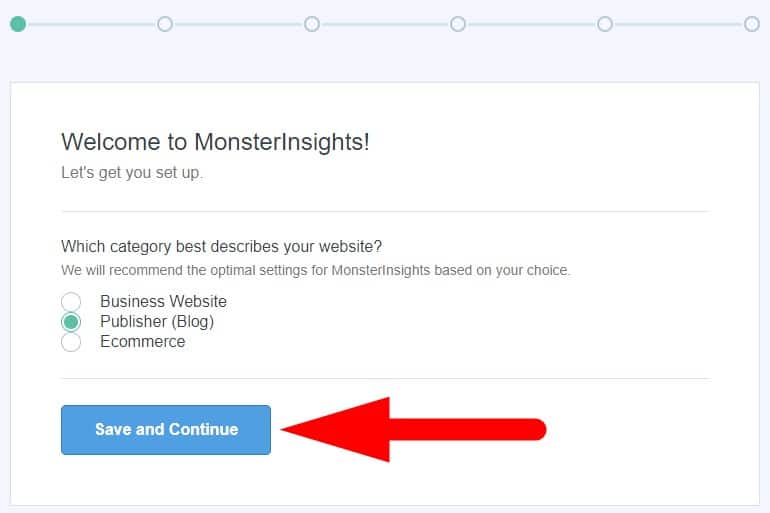
Step 3: In Wizard settings, there are 7 steps you must complete. First, you need to choose the type of your site. Then click the Save and Continue button.
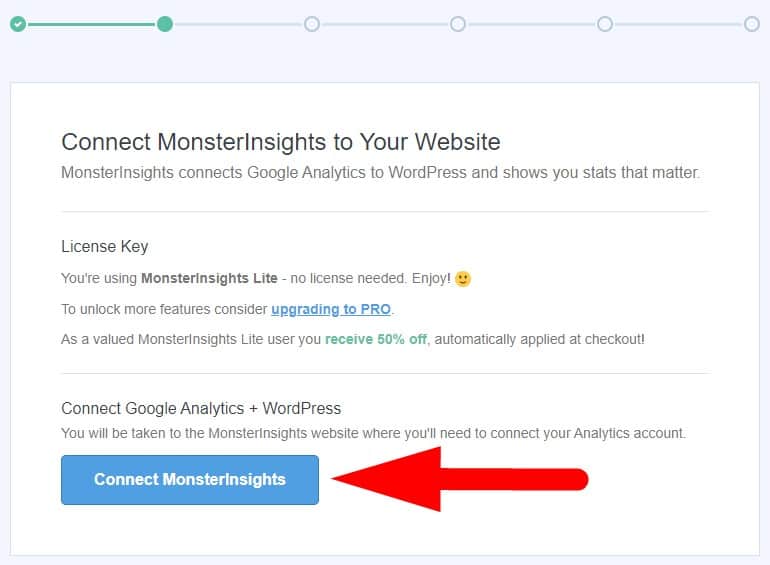
Next, you need to connect your site to your Gmail account which is you have set up the for Google Analytics. Just follow thier instruction to complete this part.
After finish, now your Google Analytics account have connected with your site and ready to analysis.
Then, on this stage just left by default or if you want an advance option you can edit here. But, I just left it by default. Click the Save and Continue button.

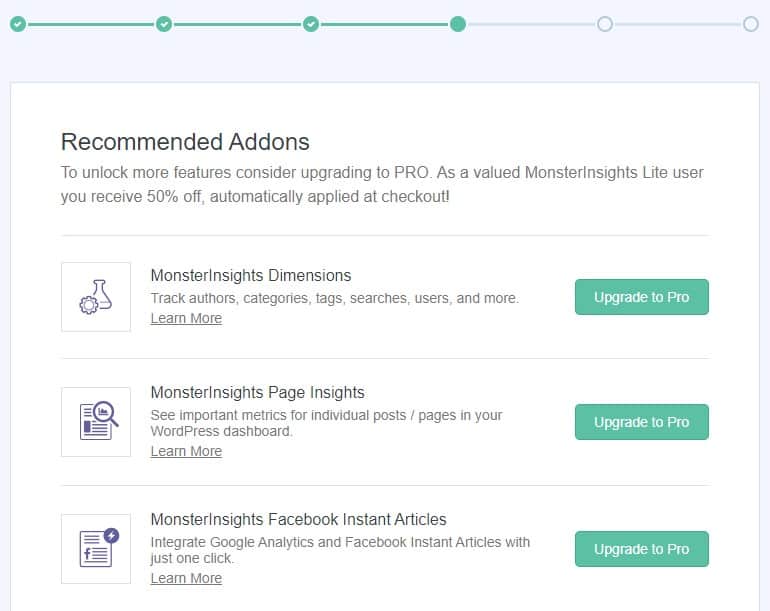
Next, on this step, it gives you an option if you want to Upgrade pro or not. If not, just click the button Save and Continue.
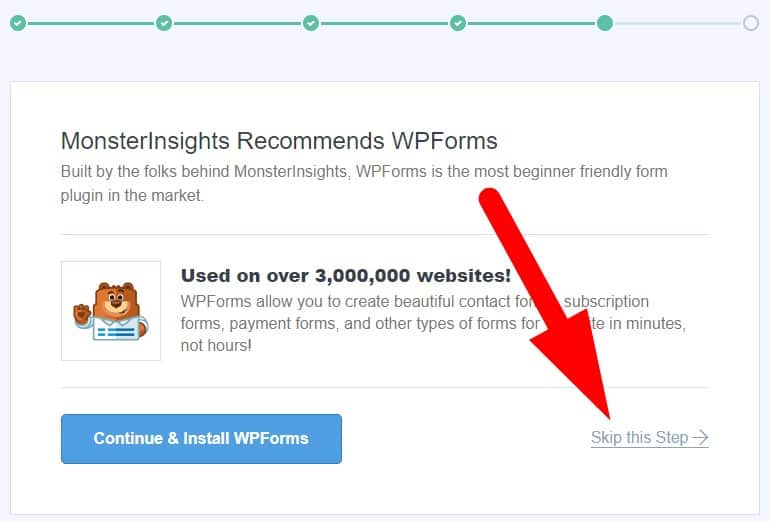
Next, you will give an option to install WPforms or not. If you want to install it, click the button Continue and Install WPForms. But, I just skip on this step.
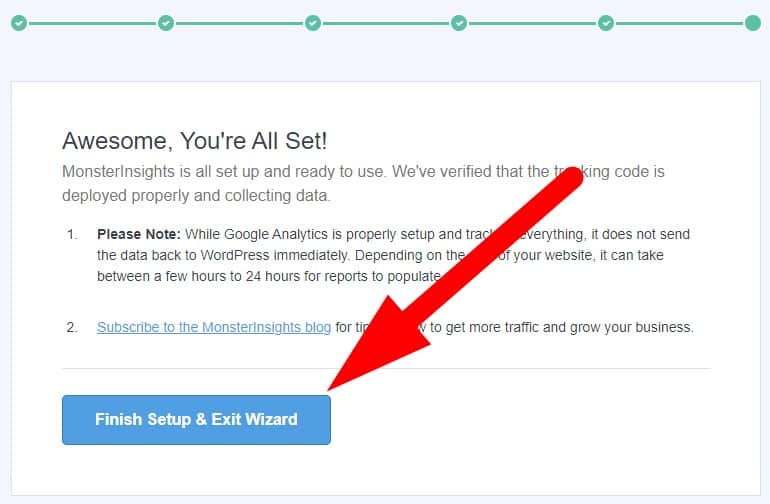
Finally, click on the button Finish Setup & Exit Wizard.
Conclusion
In this tutorial, I have shown you how to create ID or tracking code for Google Analytics and how to integrate them into your website.