
If you sell products, services, digital downloads, memberships, or accept donations online, one of the easiest ways to receive payments is through PayPal. Millions of businesses and individuals worldwide use PayPal because it offers a secure, reliable, and convenient payment solution without requiring advanced technical knowledge.
Learning how to create PayPal button functionality on your website can significantly simplify the payment process for your customers. Instead of manually requesting payments or sending invoices for every transaction, a PayPal button allows customers to make payments instantly with just a few clicks.
Whether you own a small business website, personal blog, e-commerce store, freelance portfolio, or nonprofit organization, PayPal buttons can help streamline payment collection while providing customers with a trusted payment method.
In this comprehensive guide, you will learn exactly how to create PayPal button elements for your website, including different button types, customization options, integration methods, and best practices.
Table of Contents
How To Create PayPal Button (Step by Step Guide)
What Is a PayPal Button?
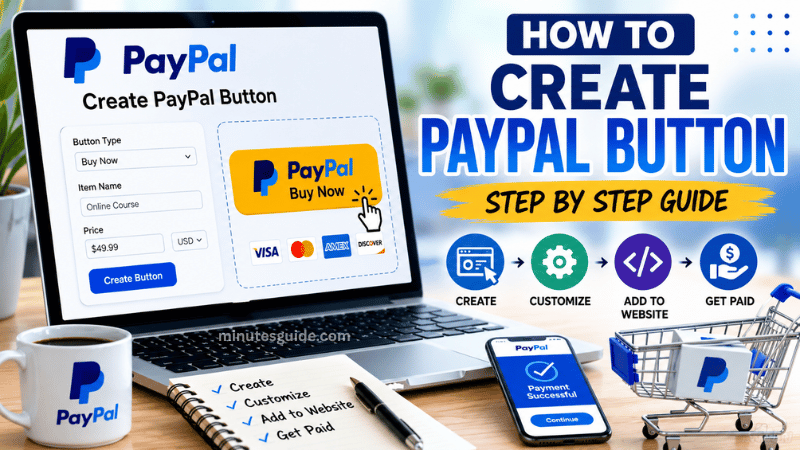
A PayPal button is a payment button generated through PayPal that can be placed on a website, blog, landing page, or online store. When visitors click the button, they are redirected to PayPal's secure payment platform, where they can complete their purchase.
PayPal offers several types of buttons designed for different business needs. These buttons allow website owners to collect payments without developing a custom payment gateway.
Common PayPal button types include:
- Buy Now Button
- Add to Cart Button
- Subscribe Button
- Donate Button
- Automatic Billing Button
- Smart Payment Buttons
Each type serves a specific purpose and can be customized according to your business requirements.
Benefits of Using PayPal Buttons
Before learning how to create PayPal button functionality, it is important to understand the advantages.
Easy Setup
One of the biggest benefits of PayPal buttons is their simplicity. You do not need advanced programming skills to generate and install a payment button.
Trusted Payment Platform
PayPal is recognized globally and trusted by millions of users. Customers often feel more comfortable purchasing from websites that offer PayPal payments.
Secure Transactions
PayPal handles payment processing and security measures, helping protect both buyers and sellers from fraud.
Mobile-Friendly Payments
Modern PayPal buttons work seamlessly across smartphones, tablets, and desktop devices.
Multiple Payment Options
Customers can pay using:
- PayPal balance
- Credit cards
- Debit cards
- Linked bank accounts
- Alternative payment methods available in their region
Fast Payment Collection
Payments are processed quickly, and funds are typically available in your PayPal account shortly after successful transactions.
Requirements Before Creating a PayPal Button
Before you create a PayPal button, make sure you have the following:
1. PayPal Business Account
Although some basic features are available for personal accounts, a PayPal Business Account is recommended because it provides access to advanced payment tools and transaction management features.
2. Website or Landing Page
You need a location where the button will be placed. This can be:
- WordPress website
- Blogger site
- HTML website
- Landing page
- Portfolio website
- Membership website
3. Product or Service Information
Prepare details such as:
- Product name
- Pricing
- Currency
- Product description
- Shipping information if applicable
How To Create PayPal Button Step by Step
Step 1: Log Into Your PayPal Account
Visit the PayPal website and sign in using your business account credentials.
Once logged in, access the business dashboard where payment tools are available.
Step 2: Access PayPal Payment Buttons
Navigate to the payment tools section.
Depending on PayPal's current interface updates, you may find payment button options under:
- Payment Tools
- Pay & Get Paid
- Website Payments
- Checkout Tools
Look for options related to creating payment buttons.
Step 3: Select Button Type
PayPal typically provides several button options.
Choose the one that best fits your business needs.
Buy Now Button
This option is suitable when selling a single product or service.
Customers proceed directly to payment after clicking the button.
Add to Cart Button
Ideal for businesses selling multiple products.
Customers can continue shopping before completing checkout.
Donate Button
Perfect for charities, nonprofit organizations, content creators, and community projects.
Subscription Button
Useful for membership websites, software subscriptions, online courses, and recurring services.
Step 4: Enter Product Details
Fill in the necessary information.
Typical fields include:
- Item name
- Product ID
- Price
- Currency
- Tax information
- Shipping charges
Be sure to review all details carefully before proceeding.
For example:
Product Name: SEO Consultation
Price: $100
Currency: USD
This information will appear during the payment process.
Step 5: Customize Button Appearance
PayPal allows customization options to match your branding.
You may customize:
- Button size
- Button text
- Button language
- Payment experience
A clear and professional-looking button often improves conversion rates.
Step 6: Configure Advanced Settings
Advanced settings may include:
- Inventory tracking
- Shipping options
- Tax calculations
- Redirect URLs
- Customer instructions
These settings are optional but useful for businesses with more complex requirements.
Step 7: Create the Button
After entering all required information, click the button creation option.
PayPal will generate HTML code for your payment button.
The code usually contains a form and button element that connects directly to PayPal's payment processing system.
Step 8: Copy Generated HTML Code
PayPal will display the code needed to embed the button.
Copy the entire code snippet.
Make sure you do not accidentally remove any characters because even small changes can prevent the button from functioning correctly.
Step 9: Add the Button to Your Website
Paste the generated HTML code into your website.
Examples include:
WordPress
Switch to HTML mode or use a Custom HTML block.
Paste the PayPal button code into the desired location.
Blogger
Open the page or post editor.
Switch to HTML view.
Insert the PayPal button code.
HTML Website
Paste the code directly into the website source code where the button should appear.
Step 10: Test the Button
Testing is essential before launching.
Click the button and verify:
- Correct product name
- Correct pricing
- Correct currency
- Successful payment processing
- Proper redirect behavior
Testing helps prevent customer frustration and lost sales.
How To Create PayPal Smart Payment Buttons
PayPal Smart Payment Buttons provide a modern checkout experience.
These buttons automatically display payment options based on customer preferences and device types.
Benefits include:
- Faster checkout
- Improved mobile experience
- Higher conversion rates
- Multiple payment methods
To create Smart Payment Buttons:
- Access the PayPal Developer Dashboard.
- Create a PayPal app.
- Obtain Client ID credentials.
- Integrate PayPal JavaScript SDK.
- Configure payment parameters.
- Embed the code into your website.
This method is more advanced but offers greater flexibility and customization.
How To Create a PayPal Donate Button
Many organizations rely on donation buttons to collect contributions.
The process is similar to creating a Buy Now button.
Steps:
- Select the Donate Button.
- Enter organization name.
- Choose currency.
- Configure donation preferences.
- Generate code.
- Add the button to your website.
Donation buttons can also support recurring contributions.
How To Create a PayPal Subscription Button
Subscription buttons allow recurring payments.
They are commonly used for:
- Membership sites
- SaaS businesses
- Coaching programs
- Online courses
- Premium newsletters
When setting up a subscription button, specify:
- Billing frequency
- Subscription amount
- Trial periods
- Cancellation settings
Recurring billing automates payment collection and reduces administrative work.
Best Practices When Creating PayPal Buttons
Use Clear Call-to-Action Text
Buttons should communicate exactly what visitors are expected to do.
Examples include:
- Buy Now
- Subscribe Today
- Donate Now
- Get Instant Access
Display Pricing Clearly
Customers should immediately understand the payment amount.
Hidden fees often reduce trust and conversions.
Test on Mobile Devices
A large percentage of users browse and shop using smartphones.
Ensure the button displays correctly on various screen sizes.
Keep Checkout Simple
Avoid unnecessary steps that may increase cart abandonment.
A smooth payment process generally improves sales performance.
Place Buttons Strategically
Effective locations include:
- Product pages
- Pricing pages
- Service pages
- Landing pages
- Donation pages
Visibility plays an important role in conversion rates.
Common Problems and Solutions
Button Not Appearing
Possible causes include:
- Incorrect HTML placement
- Website editor removing code
- Plugin conflicts
Review the code carefully and test again.
Wrong Price Displayed
Check product settings in PayPal.
Regenerate the button if necessary.
Payment Not Processing
Verify:
- Account status
- Currency settings
- Product configuration
- Account verification status
Redirect Issues
Review return URLs and advanced checkout settings.
Incorrect URLs can cause customers to land on error pages.
PayPal Button vs Payment Links
Some business owners wonder whether they should use PayPal buttons or payment links.
| No | Feature | PayPal Button | Payment Link |
|---|---|---|---|
| 1 | Website Integration | Yes | No |
| 2 | Professional Appearance | High | Medium |
| 3 | Customization | Extensive | Limited |
| 4 | User Experience | Better | Good |
| 5 | Setup Speed | Moderate | Fast |
If you have a website, PayPal buttons generally provide a more professional customer experience.
Tips to Increase Conversions With PayPal Buttons
Build Trust
Display trust signals such as:
- Customer testimonials
- Security badges
- Contact information
- Refund policies
Reduce Distractions
Keep payment pages focused on the purchase process.
Too many distractions can reduce conversions.
Offer Multiple Payment Methods
Modern PayPal buttons support several payment options, giving customers flexibility.
Optimize Page Speed
Slow-loading pages can negatively impact sales.
Regularly test your website performance.
Conclusion
Learning how to create PayPal button functionality is one of the most practical ways to start accepting online payments quickly and securely. Whether you sell products, offer services, run a membership platform, or collect donations, PayPal provides a reliable solution that can be implemented with minimal technical expertise.
The process typically involves creating a PayPal Business Account, selecting the appropriate button type, configuring product details, generating the HTML code, and embedding it on your website. Once properly installed and tested, PayPal buttons can help automate payment collection, improve customer convenience, and increase revenue opportunities.
By following the steps outlined in this guide, you can successfully create PayPal button features that deliver a smooth checkout experience while maintaining security and professionalism for your online business.
FAQ
What is a PayPal button?
A PayPal button is a payment button that can be added to a website, blog, or landing page to allow customers to make payments securely through PayPal. Depending on the button type, visitors can purchase products, subscribe to services, add items to a cart, or make donations.
Do I need a PayPal Business account to create a PayPal button?
While some PayPal features may be available to personal accounts, a PayPal Business account is strongly recommended. A Business account provides access to advanced payment tools, transaction management features, and professional checkout options that are essential for most online businesses.
Can I create a PayPal button without coding skills?
Yes. PayPal provides a button generator that allows users to create payment buttons without advanced coding knowledge. Once the button is created, PayPal generates the necessary code, which can be copied and pasted into a website.
Is it free to create a PayPal button?
Yes. Creating a PayPal button is generally free. However, PayPal charges transaction fees when customers complete payments. The exact fee structure depends on your country, account type, and transaction volume.
Can I add a PayPal button to a WordPress website?
Yes. PayPal buttons can be added to WordPress websites using a Custom HTML block, widgets, page builders, or dedicated PayPal plugins. The generated PayPal code can be inserted directly into pages, posts, or sidebars.
What types of PayPal buttons can I create?
PayPal offers several button types, including:
- Buy Now Button
- Add to Cart Button
- Subscribe Button
- Donate Button
- Smart Payment Button
Each option is designed to support different business models and payment requirements.
Can customers pay without a PayPal account?
In many countries, yes. Customers can often pay using a credit card or debit card through PayPal's guest checkout feature without creating a PayPal account. Availability may vary depending on location and account settings.
How do I customize a PayPal button?
PayPal allows users to customize various elements of a payment button, including the button type, product details, pricing, currency, shipping settings, and checkout preferences. Some advanced customizations may require additional coding.
Are PayPal buttons secure?
Yes. PayPal buttons use PayPal's secure payment infrastructure. Customer payment information is processed through PayPal's encrypted systems, helping protect sensitive financial data during transactions.
Can I use PayPal buttons for recurring payments?
Yes. PayPal Subscription Buttons are specifically designed for recurring billing. They are commonly used for membership sites, online courses, subscription services, premium content, and software products.
Why is my PayPal button not working?
Common reasons include incorrect HTML code placement, account configuration issues, outdated button settings, or website plugin conflicts. Testing the button and reviewing PayPal account settings can often resolve the issue.
What is the difference between a PayPal button and a PayPal payment link?
A PayPal button is embedded directly into a website and provides a more professional checkout experience. A payment link can be shared through email, social media, or messaging apps without requiring a website. Both methods allow customers to make secure payments through PayPal.
References
- Create a Buy Now or Pay Now button - developer.paypal.com
- How to Add A PayPal Button to Your Website in 9 Steps - fulfillrite.com/blog