Do you find for complete cPanel tutorial? Most of the beginners out there do not know how to use cPanel properly. For the first time, cPanel is quite technical to use but believe me it is very easy to use to manage your server.
What is cPanel?
cPanel is one of the most popular Linux-based web hosting control panels. It allows you to access files, databases, email, and more. In addition, it lets you conveniently manage all websites in a single place. Currently, cPanel is the industry standard and most web developers are well acquainted with it.

Today, I will show you the basic things in cPanel you should know to use.
cPanel Tutorial For Beginners
In this massive guide, I will try to divide part by part. So, it is easier for you to follow this tutorial. Please use the quick links above to choose the right topic for you.
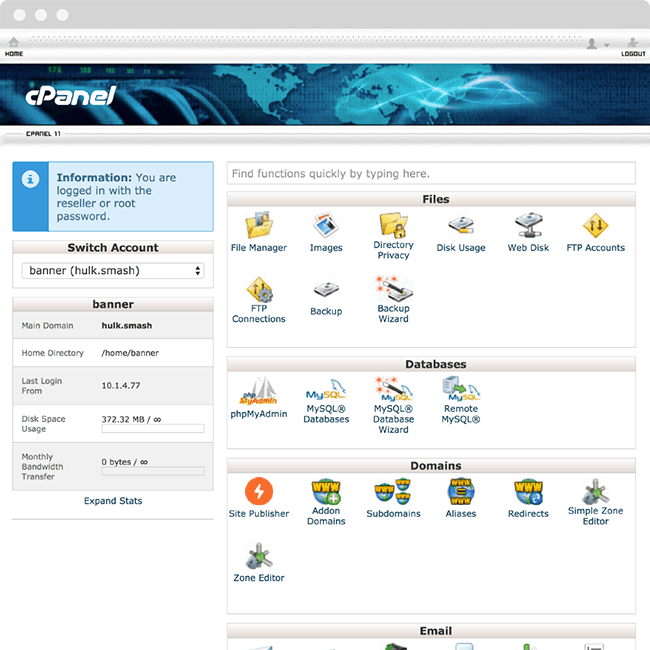
Guide 1 How to login cPanel
Login is the most basic thing but most WPBeginner out there fails to do it. Why? So many reasons. So, here is a tutorial on how to log in cPanel.
Step 1: Go to your web browser and type www.yourdomain.com/cpanel
Usually, that is the link to login in cPanel. If not, please refer to your web hosting provider support to get login info.
Step 2: Then you will see login page like the picture below.
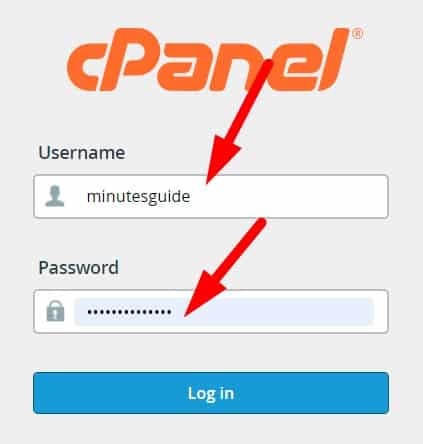
Insert your login credential and hit the button login.
Note: If you do not know where is the link for login cPanel or password, simply contact your hosting provider. They have info about your login cPanel.
Guide 2 How to navigate to web path installation
In this tutorial, I will show you how you can access into the root folder of web installation.
Every web installation will install on the public_html directory. Unless you want to make it private and do not want to show it to the public, so you need to install it out of the public_html directory.
Step 1: Stay login to cPanel.
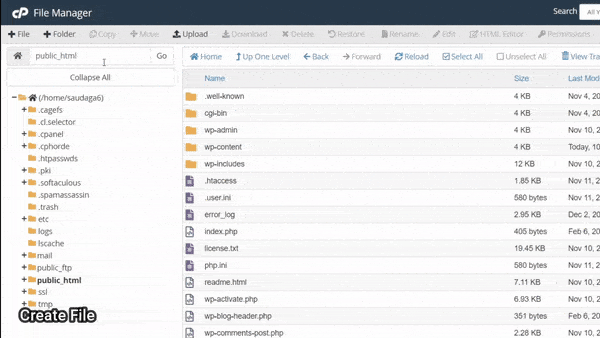
Step 2: From the cPanel dashboard navigate to Files » File Manager » public_html
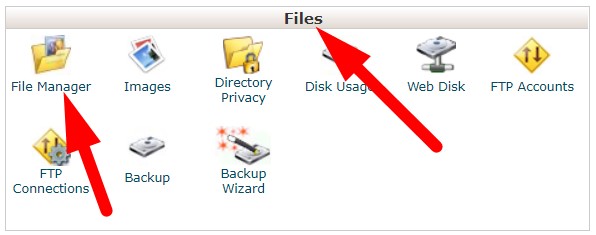
Step 3: Then, choose any web folder you wish to access.
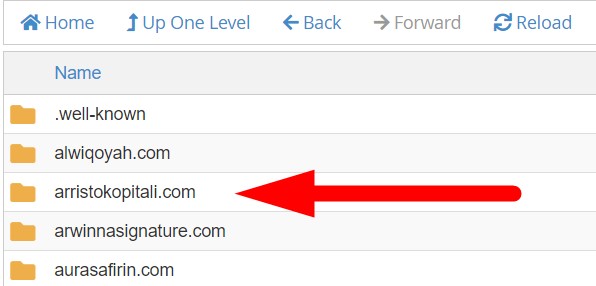
In the example above, I have installed a lot of websites on one server. So, it will look domain-listed folder. If you just install a single web in the server, your web file is definitely on the public_html directory.
Guide 3 How to backup website
Before this, I have written how to backup websites manually. But, in cPanel you can do it faster, safer, and more practical.
How?
Here, you have two options to backup your website via cPanel. Backup and Backup Wizard options. Both of them are same functionality. You need to choose which one more easy for you to use.
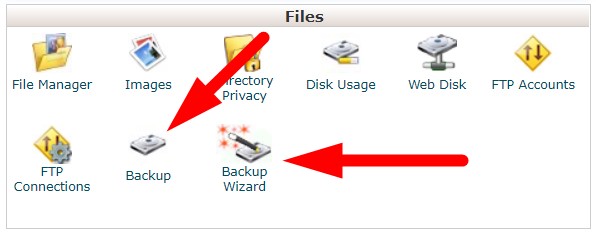
For the Backup option, you can choose a more specific file which one you want to do a backup meanwhile in the Backup Wizard option it only has three-step and you cannot choose the file. It will backup all of the files on the server.
So here, I will show both of them.
#1. Backup Option
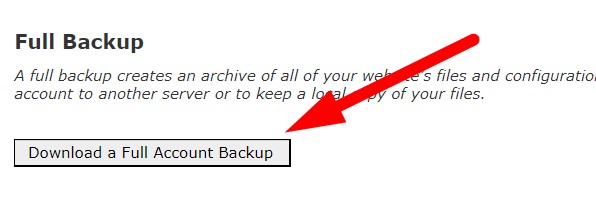
Step 1: Just click the Backup option under the Files section in cPanel.
Step 2: Click on button Download a Full Account Backup.
Step 3: Then, choose the backup destination, enter your email address as a notification, and click the button Generate Backup.
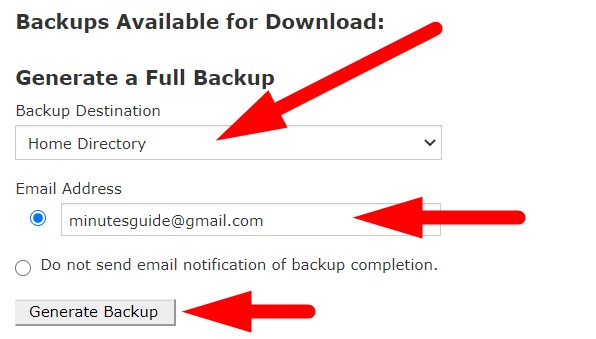
Note: Backup destination here means, where you wish to save the backup file during the backup process. Like the example above, I choose the Home directory so your backup file is in the Home directory in cPanel.
Step 4: After finish the backup process, you will able to see the download file in format .tar.gz. It is your website backup file.
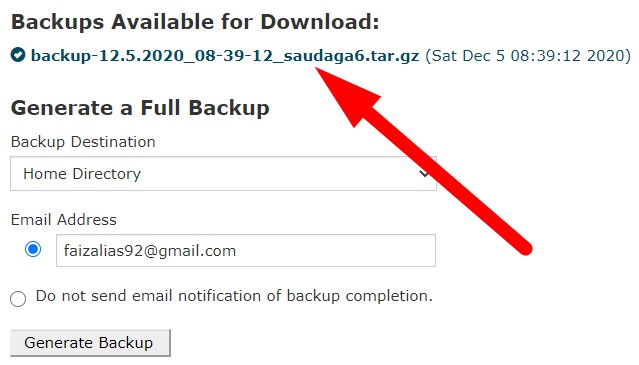
Click to download. This backup, contains website folders, MySQL database, and email that already to restore if you want.
#2. Backup Wizard
Step 1: Click on Backup Wizard option under the Files section on cPanel.
Step 2: Click the Back Up button.

Step 3: Here, you can select if you want to make a full backup or partial backup. I recommend choosing a full backup.
In full backup option, it will backup your files on home directory, all MySQL database and emails.
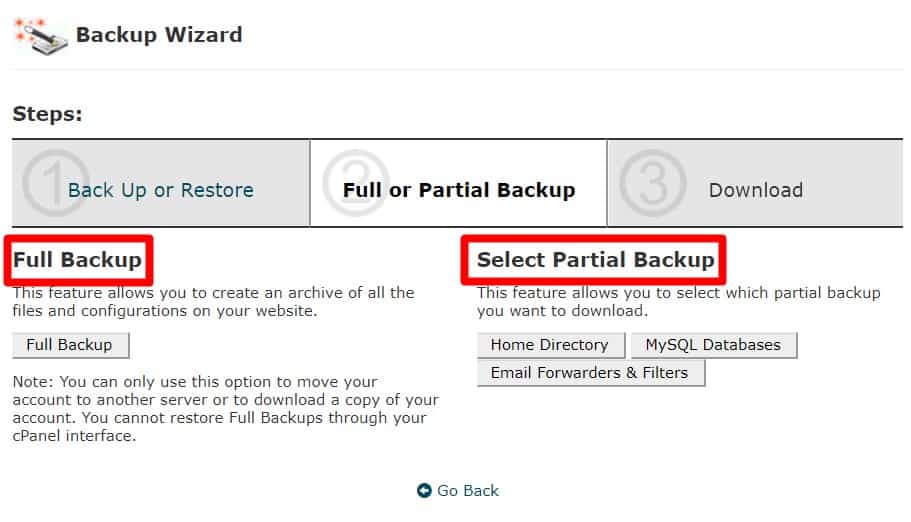
Hit the Full Backup option.
Step 4: Next, choose your backup destination, enter your email address for notification when finish backup and hit the button Generate backup.
After finish the backup process, it will available to download the file here.
For me, if Wizard Backup available in your cPanel, just use it because it more easy to use.
Guide 4 How to delete the file or folder
You need to do the maintenance of your cPanel as often as possible. At least once per month. If you found the files or folders that are no longer useful, you need to delete them. It can reduce your server resources.
So, how to delete them?
Step 1: Choose and select any file or folder you want to delete.
Step 2: On the top menu, there is a Delete function. Just hit it to delete your selected file or folder.

Step 3: Tick on Skip the trash and permanently delete the file if you want to permenently delete and hit the Confirm button.
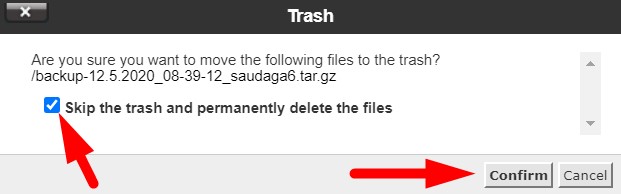
Now, your file or folder should be deleted on the server forever.
Guide 5 How to create new file or folder
Creating a new file or folder is a basic thing you need to know. Sometimes you need to create a folder or file on the server. So, how you can create a new file or folder?
Here is the tutorial.
Step 1: Stay login in cPanel.
Step 2: Go to the folder you want to create a new file or a new folder.
Step 3: On the top left menu, there are +File and +Folder.
Just click on +File or +Folder and give the name of file or folder.
Guide 6 How to change file permission
Sometimes when you want to install the software on the server, you need to change file permission. If you do not know how to change it, follow this tutorial.
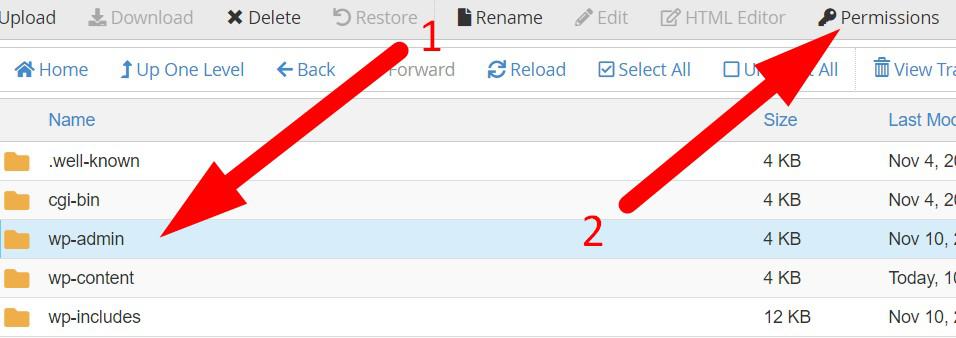
Step 1: Select folder you want to change the permission.
Step 2: On bar menu, click Permissions link to change.
Step 3: Then, the popup will appear like the picture below.
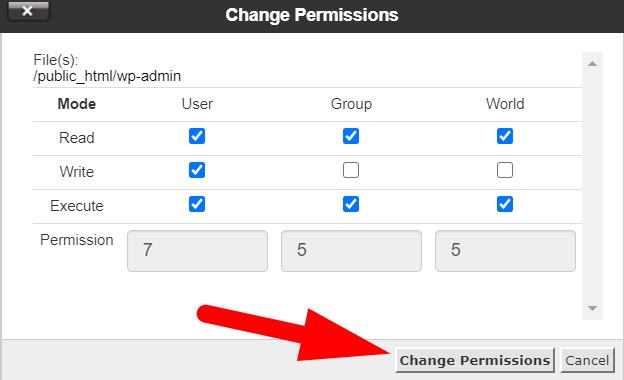
So here you need to change the permission and hit the Change Permissions button.
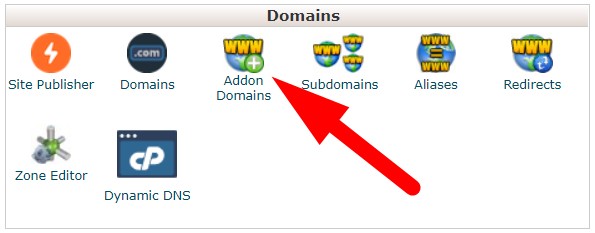
Guide 7 How to add new domain
When you want to add a new website on the same server, the first thing you need to do is add a new domain on cPanel.
Step 1: Click on Addon Domains under the Domains section.
Step 2: Here, you need to enter the domain name.
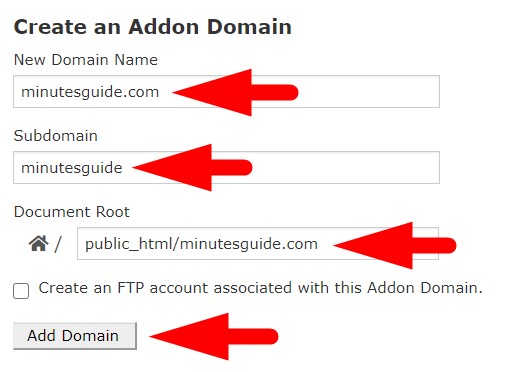
For new domain name column, just enter your domain name without http(s)://www
For the subdomain column, just enter your domain name without http(s):// and extension. For example, if your domain minutesguide.com just insert minutesguide.
For the document root column, you need to insert public_html and then your domain. This shows the path where your website folder will install. For example public_html/yourdomain.com.
If you wish to create an FTP account for your new website, just tick on Create an FTP account associated with this Addon Domain. For me, I recommend not to create a new FTP account.
Last Step: Click on the Add Domain button to complete the process.
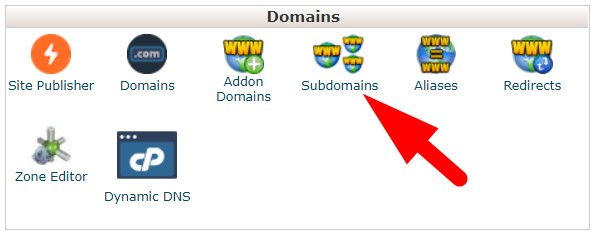
Guide 8 How to create subdomain
Subdomain is a new folder for the website but in the same domain. An example of a subdomain is blog.minutesguide.com.
So, if you wish to create it, follow this simple tutorial.
Step 1: Click on subdomain under section Domains in cPanel dashboard.
Step 2: Then you will be brought to this page. Here you need to enter the subdomain info.
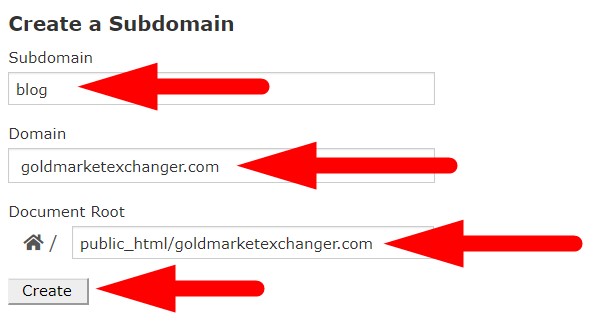
In subdomain column, just put any name you wish to create as subdomain.
In Domain column, please choose the root domain.
In Document Root, enter the path where the subdomain will be installed. Usually the path like this;
public_htmls/yourdomain.com/blog
Where is "blog" in behind is your subdomain. So, the finale your URL will become blog.yourdomain.com
Then, click the Create button.
Done!
Guide 9 How to create new database
For creating database I have shown you in details at the guide how to create new database on server.
So, I will show you briefly here.
Step 1: Click on the MySQL®Databases on Database section in cPanel dashboard.
Step 2: Give database name and click the button create database.
Step 3: Now, you need to create Username of database. Enter any name fr your username. Then you need to create a secure password and hit the button Create User.
Step 4: Then, when you are already built a database and username, now you need to add user to the database.
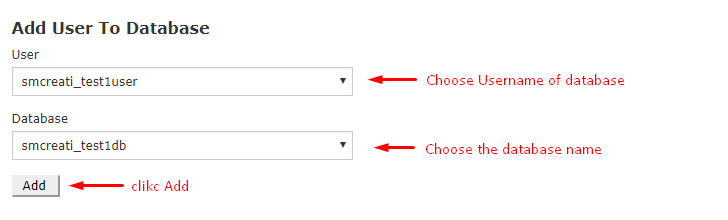
Step 5: Next, manage user privilages and hit the button make changes.
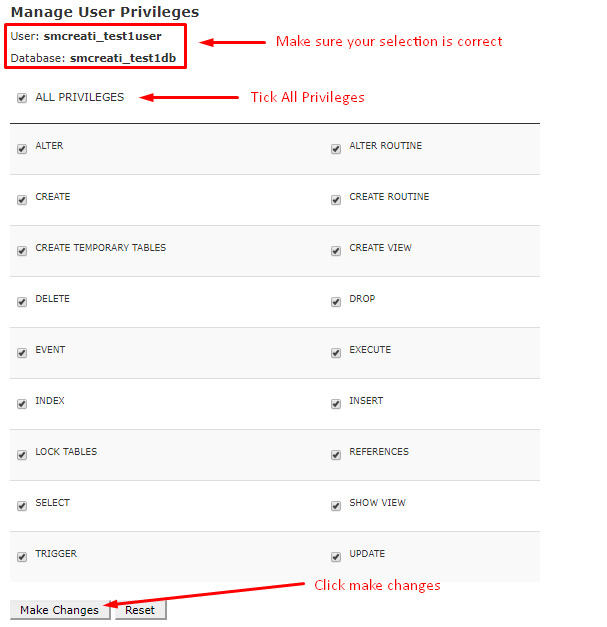
Done!
Now you have a new database.
Guide 10 How to create email
The best thing about cPanel, you can create a custom email domain directly from it. It is very easy to use.
Follow this simple step.
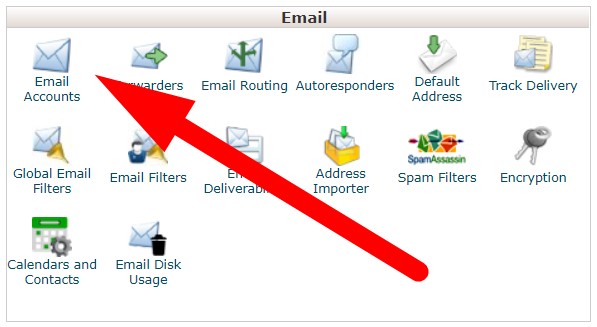
Step 1: Click on Emails Accounts under Email section in cPanel dashboard.
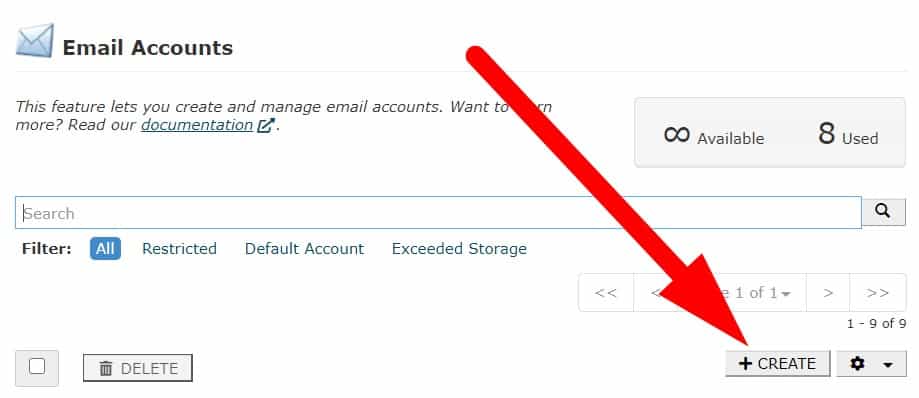
Step 2: Click on the create button to go to the next step.
Step 3: Here, you need to enter your email info that you wish to create.
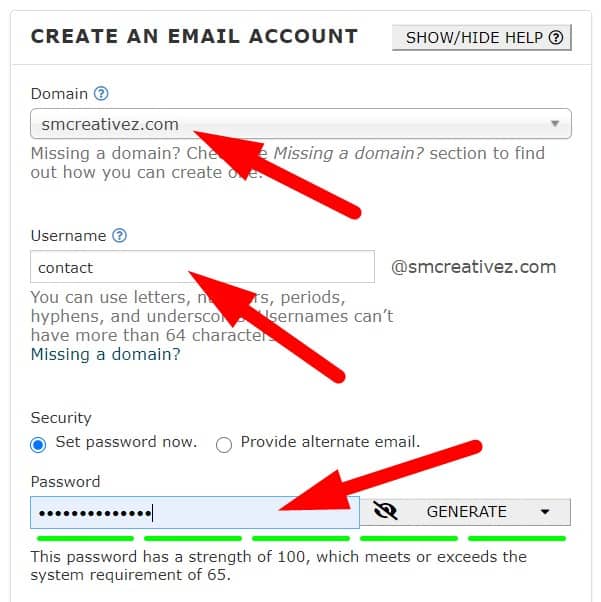
In the domain column, choose the domain name you want to create a email domain.
In the username column just write what email you want to create. For example, if you choose "contact" so, your email will become contact@yourdomain.com
Then, choose the password for your email.
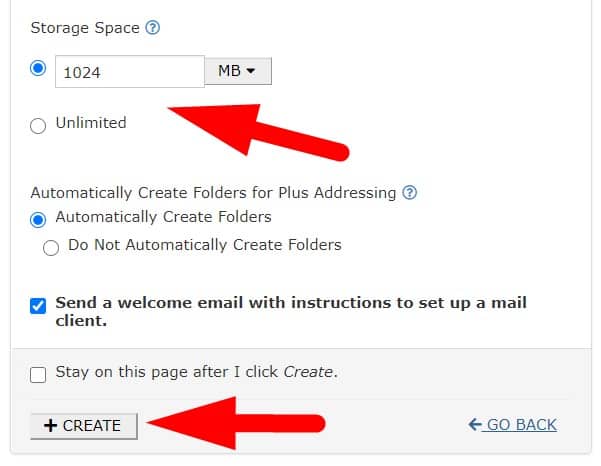
Next, for storage space, you can choose whether you want to limit or unlimited storage to save your email.
Lastly, click the Create button to complete the email creation.
Guide 11 How to change password?
For security reasons, you need to change your cPanel password frequently.
So, how to change your cPanel password?
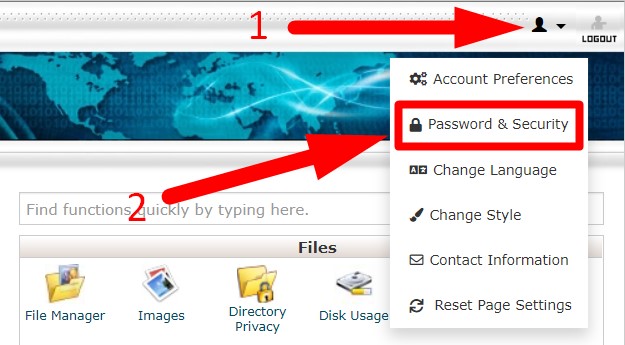
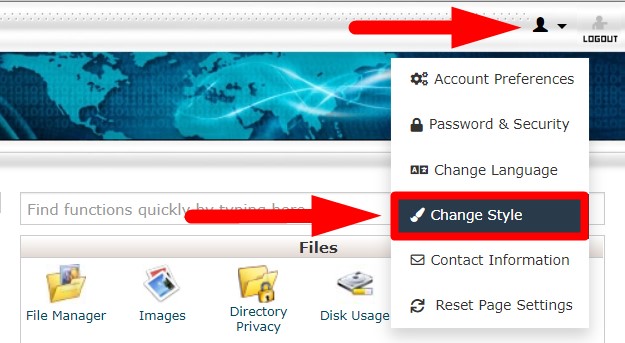
Step 1: If you use a retro theme, look at the upper right and click on the person icon. Then, you will see the dropdown to choose the options Password & Security.
Step 2: Enter your old password, and choose your new password.
If you do not have options or no ideas for a new password, you can use Password Generator.
It will create you 100% secure password for your cPanel.
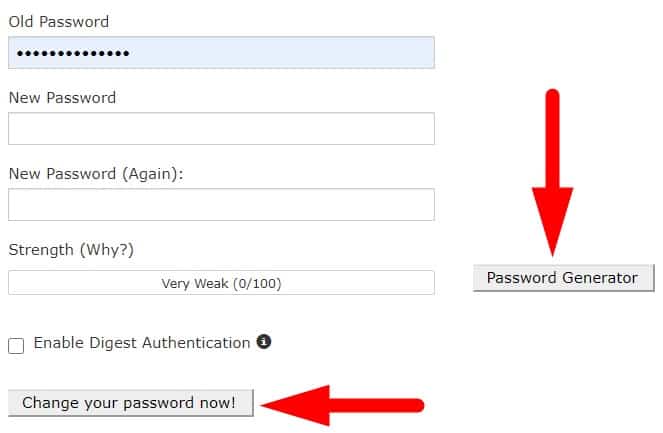
If you satisfy with your password change, click the button Change your password now!
Guide 12 How to change cPanel style?
For me, I like to use retro style even though its old design look because, with retro style, it looks more simple and easy to learn about cPanel.
So, for beginners, I would like to recommend you to use this style.
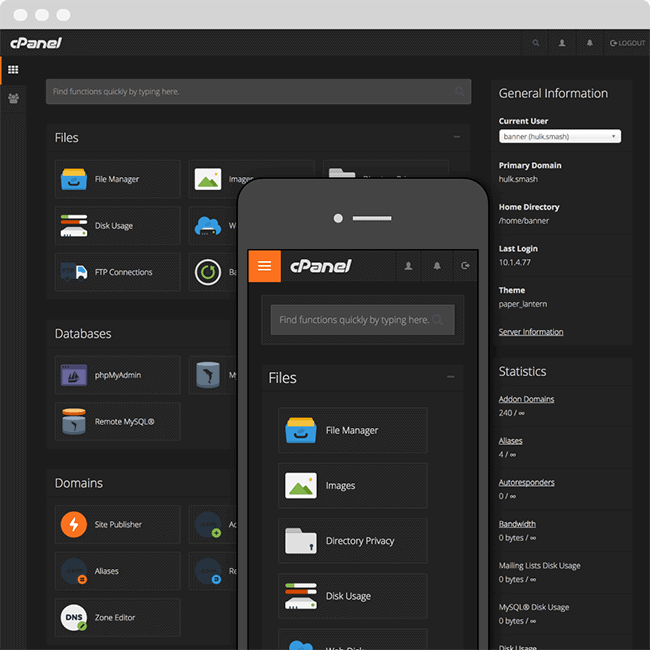
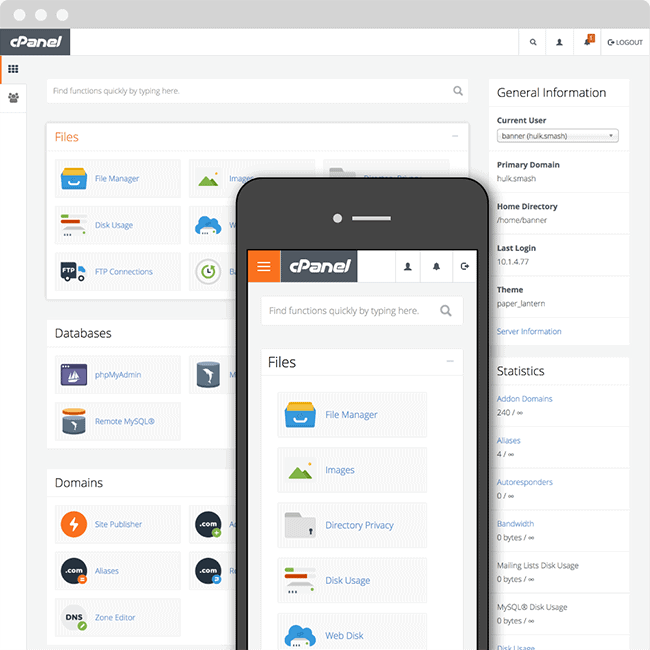
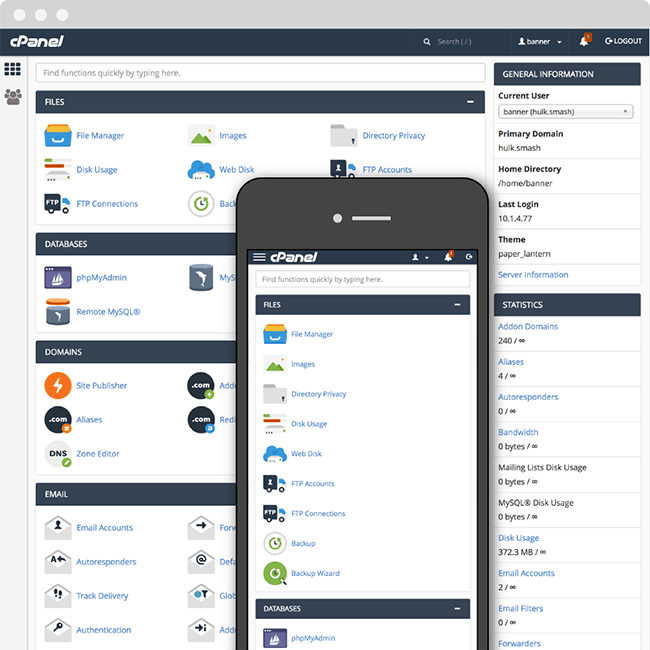
So, how you can change the cPanel style or template?
Step 1: Upper right on cPanel, click on the man icon. Then you will see the dropdown option to choose Change style.
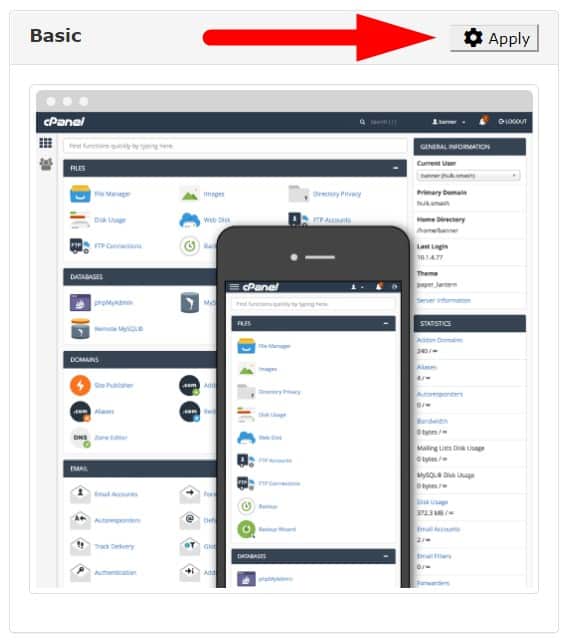
Step 2: Then choose any design style you want and click the button Apply.
Done!
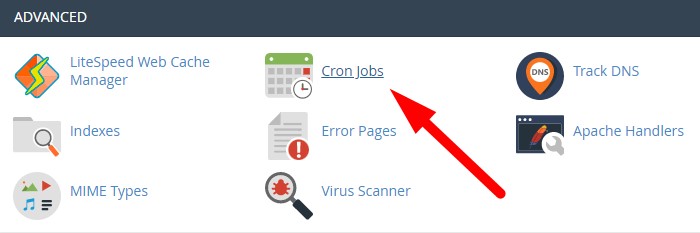
Guide 13 How to Use Cron Job cPanel
A cron job is a command used for scheduling tasks automatically. This is normally used to schedule a job that is executed periodically. For example, to send out a email every morning. Some scripts, such as MailWizz and Sendy may require you to set up cron jobs to perform certain functions.
Step 1: Login to your cPanel
Step 2: On Advanced section, find the Cron Jobs and click.
Step 3: I am sorry. On this part it is quiet hard to explain. But I hope you can understand what I want to tell you.
If you look the picture below, there are some types of time such minutes, hour, day, month and weekday.
All of these, you need to insert based on cron job command.

Ok, for example.
Here is cron job.
| Description | Cronjob |
|---|---|
| Campaigns sender, runs each minute. | * * * * * /opt/cpanel/ea-php74/root/usr/bin/php -q /home/kancil/public_html/app/apps/console/console.php send-campaigns >/dev/null 2>&1 |
| Transactional email sender, runs once at 2 minutes. | */2 * * * * /opt/cpanel/ea-php74/root/usr/bin/php -q /home/kancil/public_html/app/apps/console/console.php send-transactional-emails >/dev/null 2>&1 |
| Bounce handler, runs once at 10 minutes. | */10 * * * * /opt/cpanel/ea-php74/root/usr/bin/php -q /home/kancil/public_html/app/apps/console/console.php bounce-handler >/dev/null 2>&1 |
If cron job mention for minutes, please click on the Common Settings for minutes (number 1) and put the Command (number 2).
Usually, when you directly put the command, automatically they will choose the right option for you.
It hard to explain here.
You just need to try it and you will understand what I say.
If you still do not understand what I explain, please drop a comment below.
Conclusion
In this tutorial, you have learned how to use cPanel for basics such as upload files, upload folders, create an email, and more. You need to know how to use them because when you have your own website, you will use cPanel frequently.
This tutorial I have designed is just for beginner users only. So, If you want to learn about cPanel, you may learn it here.
Please follow this guide because I will update and add tutorials from time to time.