Are you looking for how to add a WordPress site to Google Search Console? Google Search Console is one of the most important SEO tools that you can use for free. Previously, it knows as Google Webmaster Tools but Google rebranding it to Google Search Console.
There are many benefits you can get from Google Search Console. It can generate a full report about your website performance by day, week, and month, improve the site in the search result, troubleshoot problems, submit sitemaps to search engines to get faster indexes, inform you if there are broken links in your site, and more. So, with all of these, you can improve your site better to get more traffic.
In this article, I will show you how you can add your WordPress site to Google Search Console. Actually, this method you can use for any platform site you use. Not just focus on WordPress only.
There are two methods of how you can add to Google Search Console. First, by domain dan second by URL prefix?

So, what the different of this type?
| Domain | URL Prefix |
|---|---|
|
|
So, if you want analysis for the whole domain (include subdomain), choose the Domain verification process or if you want analysis only the specific URLs, choose the URL prefix.
How to Add WordPress Site to Google Search Console
Before we start the tutorial, first of all, you need to sign in to your Gmail account because Google Search Console will sync with your Gmail account. If you do not have a Gmail account, please sign up for one.
Method 1: Add by Domain
Step 1: After login into your Gmail, go to GCS Dasboard. You should redirect to the dashboard now.
Step 2: On right menu, click on search property and Add property to add your new website.
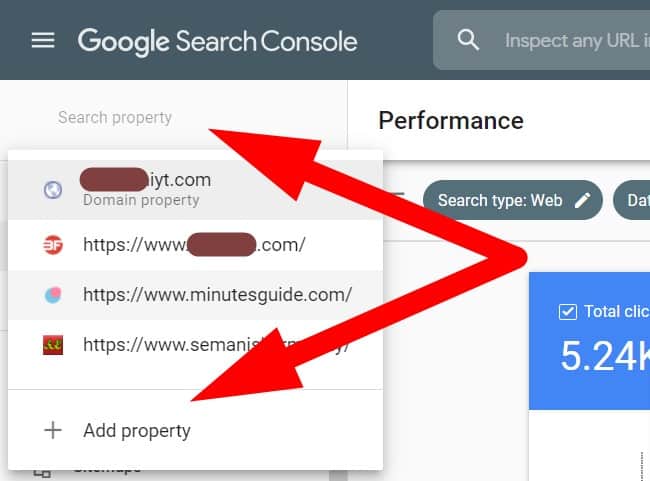
Step 3: Then you will see the popout like the picture below.
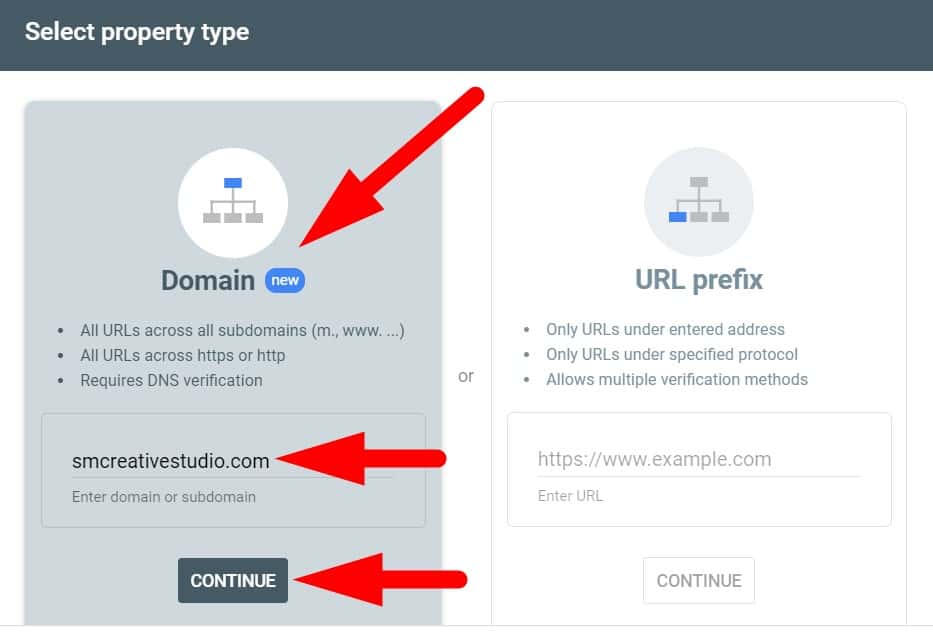
Here, you have two options. You can add by Domain or URL prefix. Now I will show you how to add by Domain. In the second method, I will show you the add by URL prefix.
So, select the Domain box area, enter the domain (without https://www) and click on the continue button.
Step 4: Now you need to verify your domain ownership via DNS record.
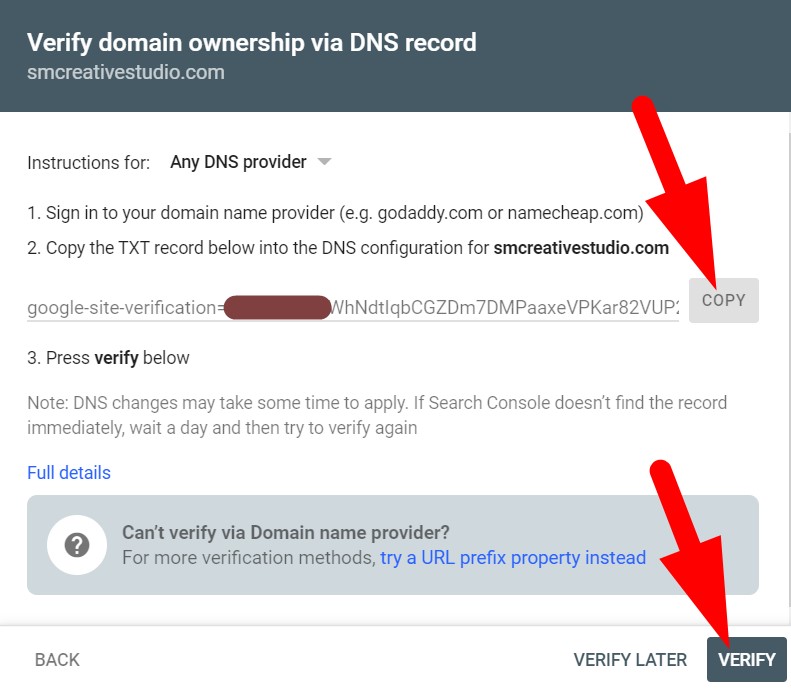
You need to copy the TXT record like the picture above and paste it into your DNS configuration. If you do not know how to do, just contact your web server and give the TXT record to them.
Simply, I show you how to paste it into your DNS.
Open your DNS zone editor. You can do this via cPanel or your hosting provider account.
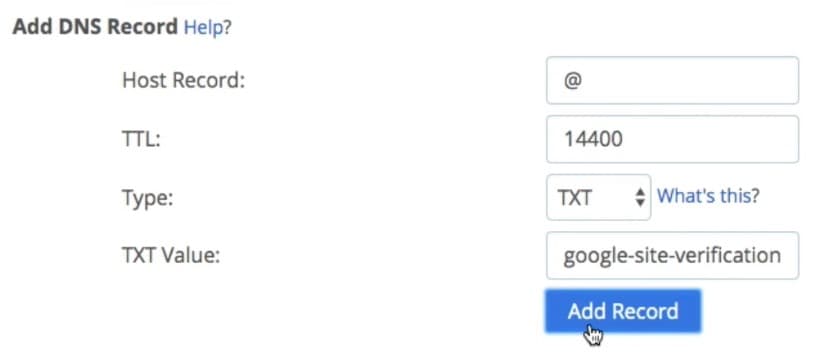
And fill all the column like this.
Host Record: @
TTL: 14400
Type: TXT
TXT Value: copy and paste Your TXT record verification
Then, click add record button.
Go back to your Google Search Console dashboard and click the Verify button.
Sometimes your DNS change takes time to propagate. So, please wait for an hour to fully propagate for the verification process.
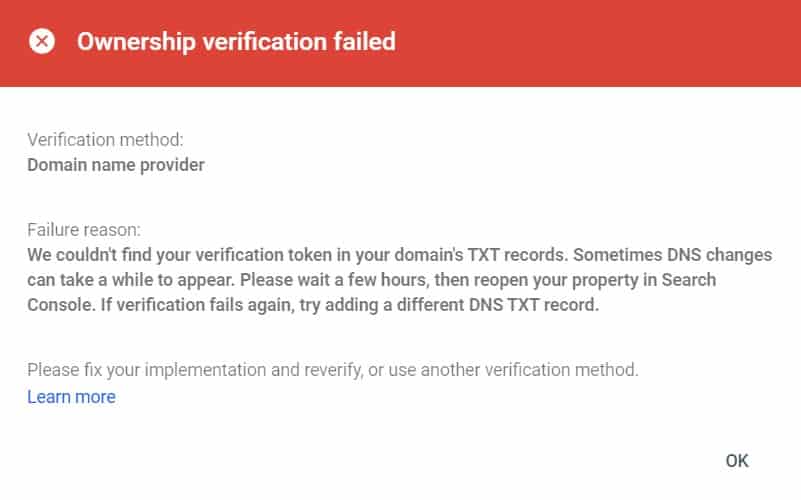
If everything was ok after an hour, your domain name verification should not have a problem and you will receive the message like the picture below.
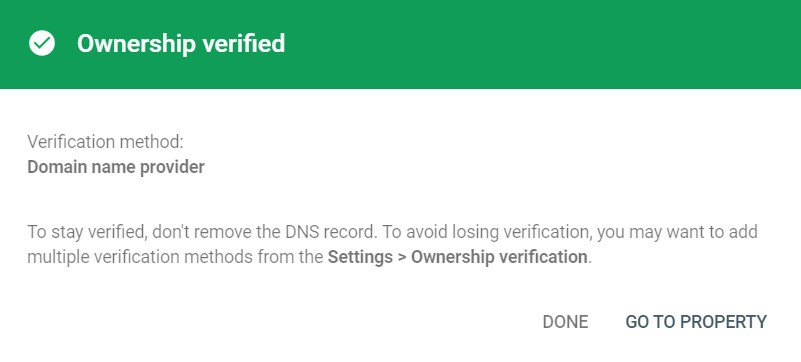
If not, please follow the second method below.
Method 2: Add by URL prefix
Step 1: For step 1 and step 2 it is same on the method 1 above. Please refer above. So, I skip to step 3.
Step 3: Click on the URL prefix box, enter the domain name include https://www and click the Continue button.
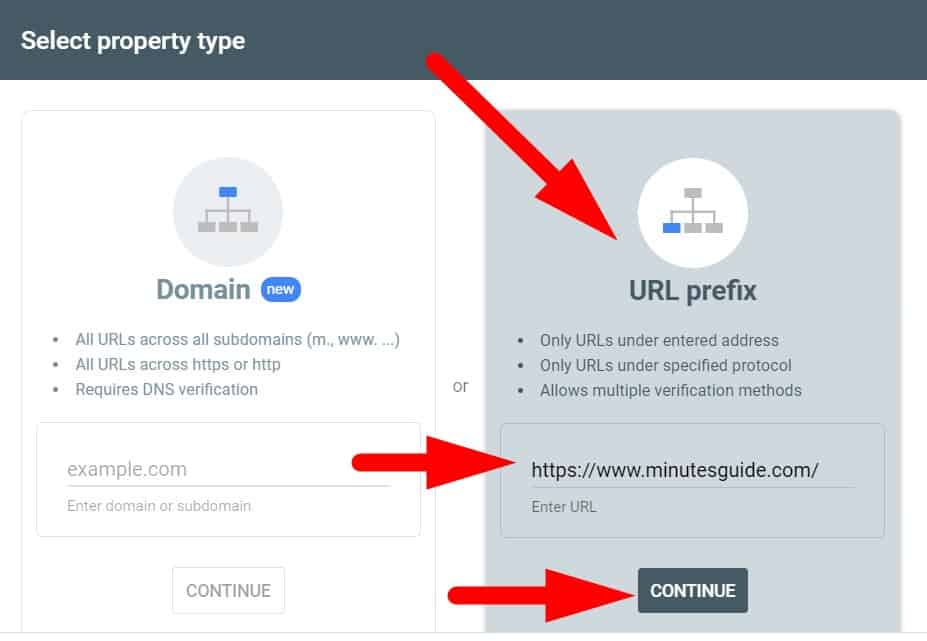
Step 2: Then, you need to download the file (verification code) and upload it on the root domain.
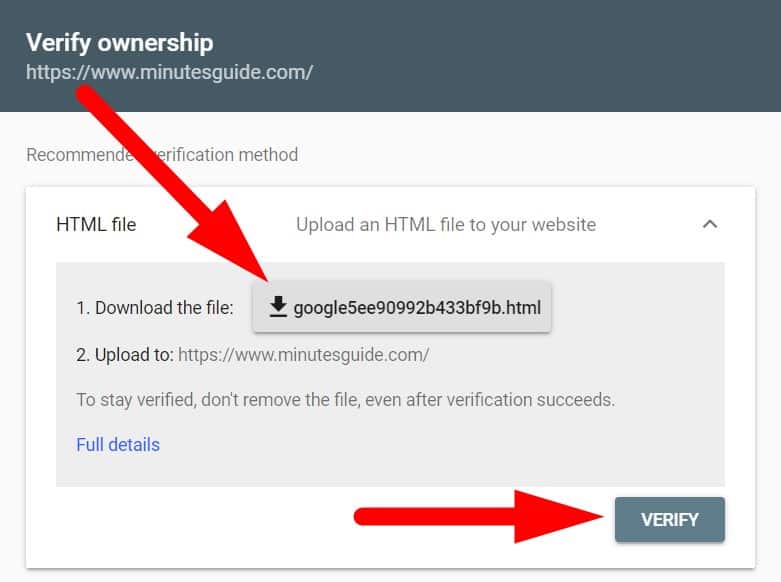
To do this, you can upload via cPanel or FTP client. You can refer to our guide on how to upload files to the server via FTP client. Then, click on the verify button to complete you verification process.
Usually, this method is instant verification process. So, you should receive the message like the picture below.
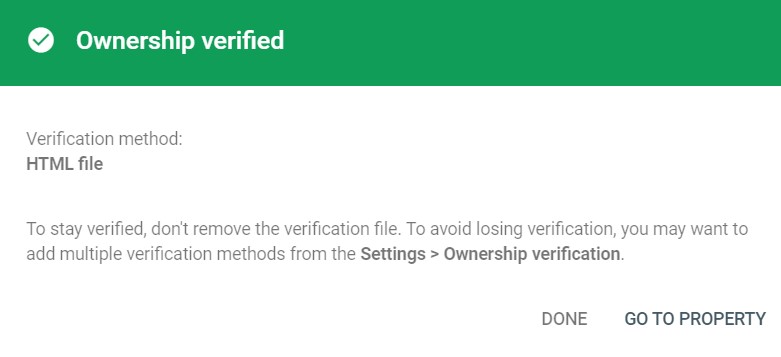
Now, everything is done.
Just wait for an hour to system analysis you website data.
Conclusion
In this tutorial, you have learned how to add WordPress site to Google Search Console. It is very easy. Hope this tutorial help you a lot.


0 Comments