How to Manually Install WordPress? Actually, install WordPress using softaculous is easier than the manual method. You just fill in the blank about your web info and click install. Then, you already have a WordPress site.
But, in some cases, you cannot install it via softaculous. Maybe your host provider not provide softaculous in their server and need you to subscribe to it if you want. So, the best way is you can install it manually.
Install WordPress Manually
How to install it? Just follow the tutorial below. Before we start, we assume you already get hosting from host provider.
Step 1: First of all, download the latest version of WordPress from WordPress.org's official website.
Step 2: Upload WordPress copy into your hosting. You must upload it into your domain which you wish to install it.
If your current installation domain is the primary domain on hosting, upload it on public_html. If your domain is an addon domain in hosting, upload it on public_html » Your Domain Folder. This folder or path may vary on your side.
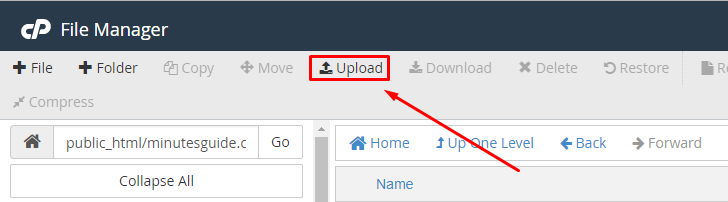
Here you can upload by using two methods. You can upload it directly via cPanel or via FTP. But, in this tutorial, I will show you by using cPanel. Both are the same process but the different methods.
Do not forget to extract file after you finish upload it.
Tips: If you upload file directly into cPanel, you must upload it in .ZIP format. If you upload the file using FTP, you must extract it first before upload.
Step 3: Now, your WordPress copy safely uploads into the server. Next, create a new database. Make sure while you creating a new database, save your database info in notepad.
Step 4: After you have finish create the database, go to your browser and type yourdomain.com/install and you will go directly to the installation page.
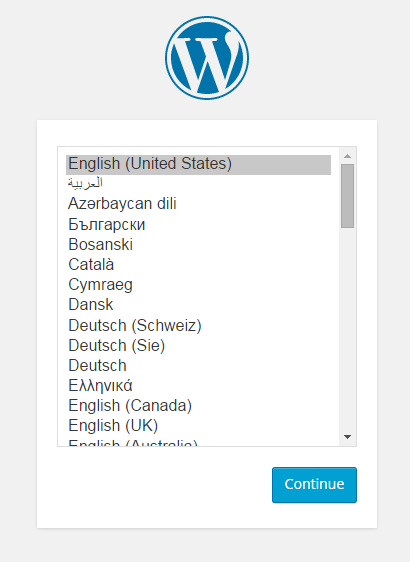
Step 5: The first thing you see is choosing language. Select your desire language and click on the continue button.
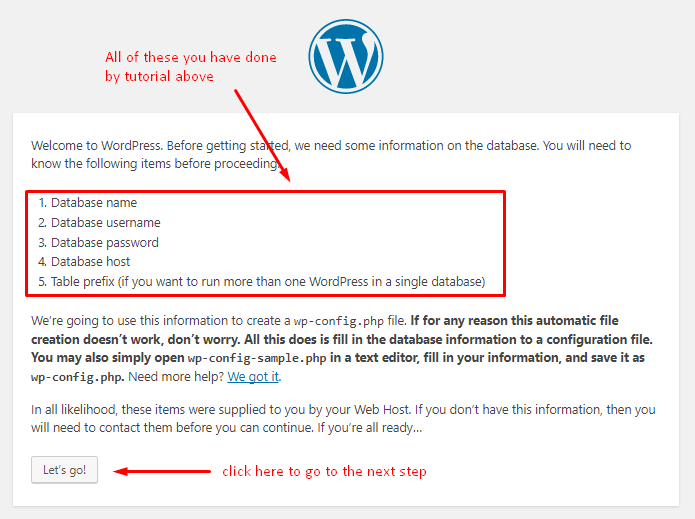
Step 6: On the next page, you will see this notification. Please ignore because all of these you have done on Step 3: above. Skip it by click "Let's go"
Step 7: Then, you will see the following page. Fill all the blanks. This info you should get during you creates the database. Look back at Step 3:.
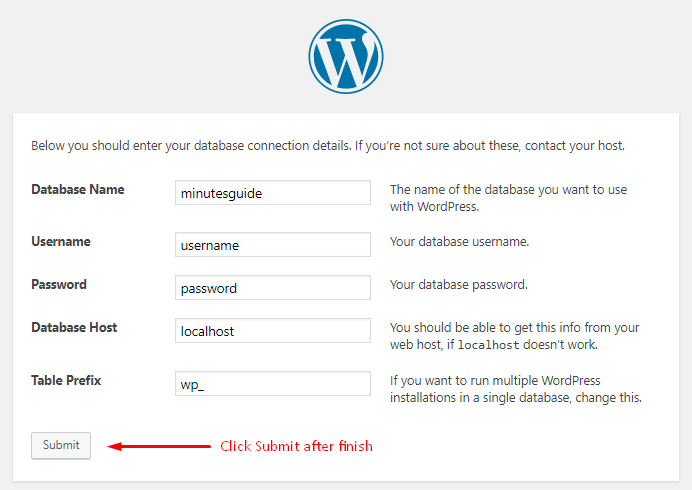
After finish, click the submit button.
Step 8: In The Last process, put your site info like site title, username, password, and more. Please refer to the screenshot below.

Last Step: Lastly, click on Install WordPress button and your WordPress already sets.
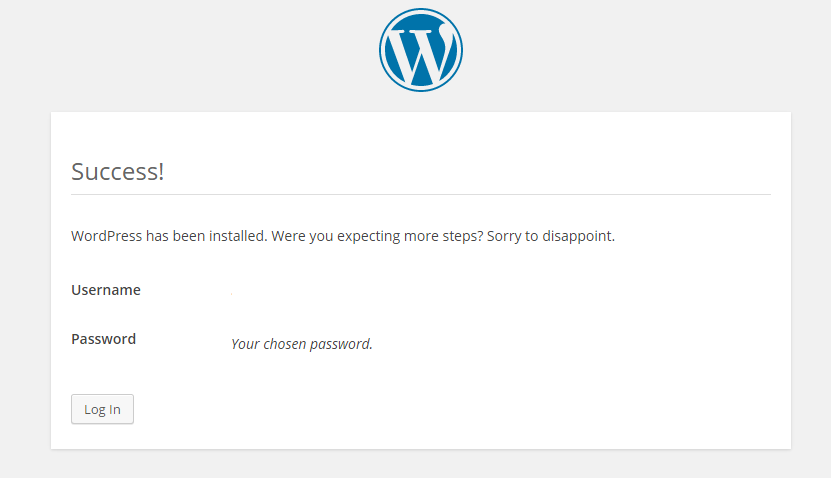
Now, time to try log into your WordPress.
Go to your browser, and write www.yourdomain.com/wp-admin.
Conclusion
In this tutorial, you have learned how to install your WordPress manually. It is very easy. Just follow our step one by one. If you get stuck, please leave us a comment and we will reply as fast as possible.